
SLAM 3D Scanning Explained: How Real-Time Mapping Powers Modern Workflows
What SLAM 3D Scanning Solves That Photos and Laser Scanners Can't
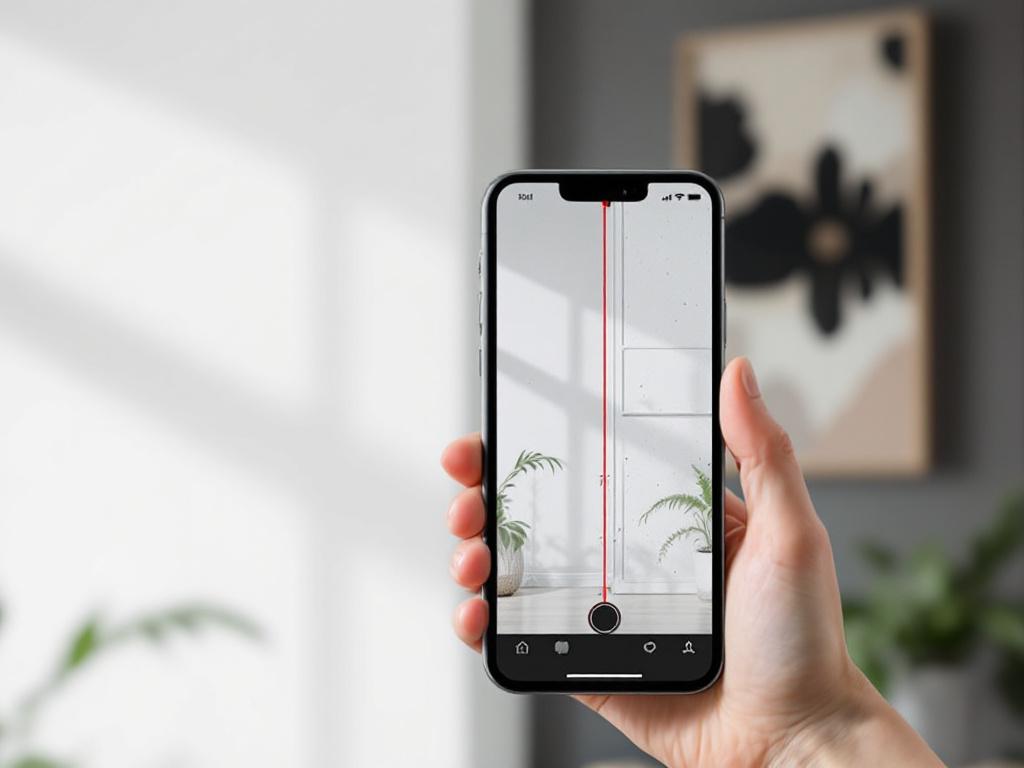
You're standing in a 2,000-square-foot warehouse, a 1920s row house, or holding a damaged gearbox housing, and you need a 3D model in your hands within the hour. Flat photos lose every spatial relationship that matters. Cloud photogrammetry tacks 20 to 60 minutes of upload and processing latency onto every capture. A Leica BLK360 or FARO Focus terrestrial scanner will solve the problem — and lighten your bank account by $15,000 to over $50,000. SLAM 3D scanning closes that gap. It runs on the iPhone in your pocket, finishes the model before you leave the room, and costs nothing per scan.
SLAM is the technique a device uses to figure out where it is in space while simultaneously building a 3D map of that space. The device is both surveyor and surveyed. The acronym — Simultaneous Localization And Mapping — is secondary to the capability. According to industrial scanning manufacturer FARO Technologies, SLAM enables a device to "build a map of an unknown environment while simultaneously keeping track of its location within that environment." The technique was developed in robotics research in the 1980s and 1990s for autonomous navigation; it now lives inside every modern iPhone Pro.

Table of Contents
- What SLAM 3D Scanning Solves That Photos and Laser Scanners Can't
- Inside the SLAM Pipeline — How Your Phone Builds a 3D Map in Real Time
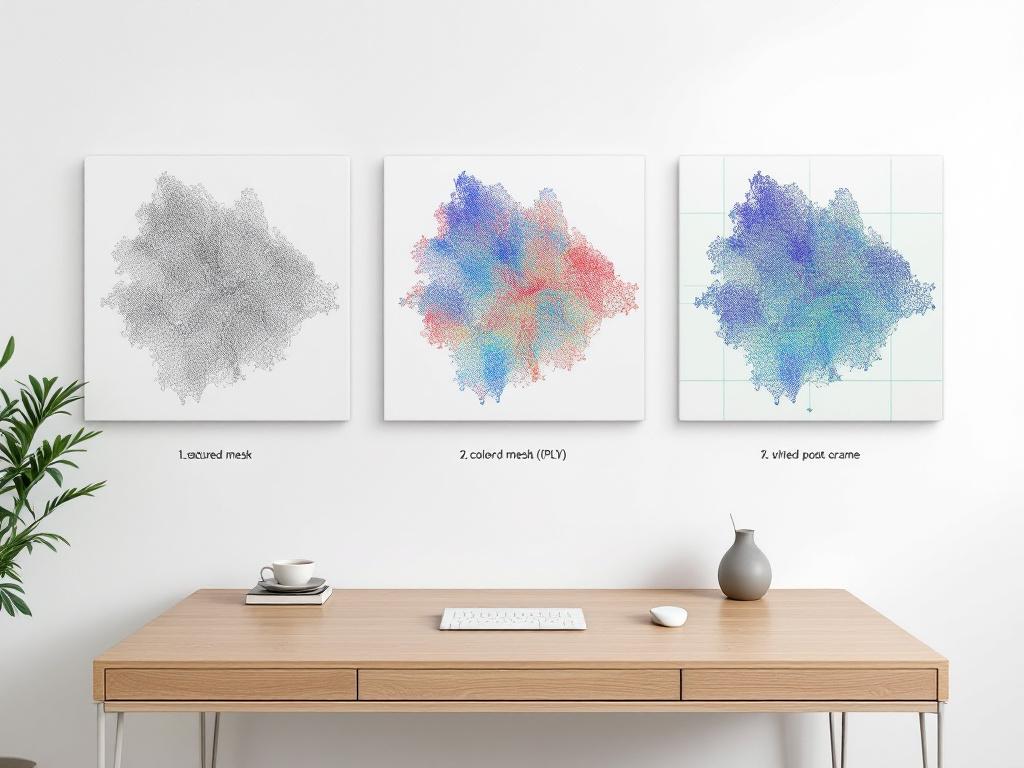
- Choosing Between Mesh, Point Cloud, Pose+Video, and MultiCam
- Where SLAM Hits Its Accuracy Ceiling (And How to Push It Further)
- SLAM vs. Photogrammetry vs. Laser Scanning — A Working Comparison
- Matching SLAM Capture to Your Profession — Four Workflows
- The SLAM Capture Field Checklist
- Frequently Asked Questions About SLAM 3D Scanning
The friction is concrete. A real estate agent shooting 40 listings a month doesn't have a spare hour per property to wait on cloud photogrammetry. An engineer staring at a damaged manifold needs spatial geometry now, not after a render queue. A heritage surveyor walking a 1920s row house can't justify a $30,000 scanner for a four-day project. And in every one of those cases, flat photos collapse the depth dimension that makes the work useful in the first place.
SLAM does three things that photos, cloud photogrammetry, and tripod laser scanners cannot do simultaneously.
It runs in real time, on-device. No cloud upload. No queue. The mesh appears as you move the phone. You see holes forming and fill them before walking out the door.
It needs no external reference. No GPS, no fiducial markers, no surveyed control points. The algorithm bootstraps spatial understanding from the camera feed alone, with LiDAR depth assist on iPhone 12 Pro and later.
It self-corrects through loop closure. When the camera revisits a previously mapped area, SLAM recognizes it and snaps the geometry back into alignment, eliminating accumulated drift.
Photogrammetry is the closest software competitor. It is passive, cloud-dependent in most consumer apps, requires 50 to 200 overlapping photos shot at varied angles, and processes in distant datacenters. Surface fidelity is excellent; capture-to-model latency is not. Terrestrial laser scanning is the closest hardware competitor. It is active, tripod-mounted, generates dense survey-grade point clouds, and starts at $15,000 for entry-level units. Tripod-mounted scanners give you sub-millimeter precision and zero real-time feedback during capture.
SLAM's power isn't that it's fast. It's that the entire spatial model lives on your device before you leave the room.
Voxelio is a free iPhone LiDAR scanner app built on Apple's ARKit SLAM stack with LiDAR depth fusion. It exports textured OBJ and USDZ meshes, colored PLY point clouds, and HEVC video with frame-accurate camera poses — all generated on-device, with no subscription, no per-scan limits, and no cloud round-trip. It's compatible with iPhone 12 Pro and later, plus iPad Pro models with LiDAR.
The rest of this article answers the four questions that matter once you've decided real-time 3D capture is the right tool: How does the SLAM pipeline actually work? Which of the four capture modes fits your job? How accurate is it really? And when should you reach for something else? If you're new to spatial capture entirely, the broader 3D scanning workflow is worth a separate read; this guide assumes you've decided SLAM is on your shortlist.
Inside the SLAM Pipeline — How Your Phone Builds a 3D Map in Real Time
You don't need a computer vision PhD to use SLAM 3D scanning effectively. You do need to understand the pipeline well enough to know why captures fail and how to fix them. Voxelio leans on Apple's ARKit framework for tracking and pose estimation rather than reinventing it from scratch — which is precisely why iPhone 12 Pro is the hardware floor. The LiDAR sensor and the Visual-Inertial Odometry hardware acceleration arrived together on that chassis.
Here is the seven-stage pipeline that turns a moving camera into a textured 3D model.
1. Keyframe Extraction. The app does not process every frame from the 30 to 60 fps video stream. Instead, it samples keyframes at intervals where the camera has moved enough to add new spatial information — typically 2 to 5 frames per second of meaningful motion. Processing every frame is computationally wasteful and adds noise without adding geometry.
2. Feature Detection and Tracking. Within each keyframe, the algorithm identifies visually distinctive points: corners, edges, high-contrast textures. These become the anchor points the system tracks across subsequent frames. Surfaces with no features — blank white walls, mirrors, glass, polished concrete — are tracking-hostile because there's nothing to lock onto. This is the single most common cause of capture failure, and the fix is often as simple as introducing physical 3D scanning markers or moving objects into the frame to give the detector something to grip.
3. Camera Pose Estimation. Using how feature points shift between keyframes, the algorithm calculates the camera's 6DoF position — X, Y, Z translation plus pitch, yaw, and roll rotation — at each keyframe. This is the localization half of SLAM.
4. Depth Fusion. On iPhone 12 Pro and later, the LiDAR scanner emits infrared pulses and measures return time to build a per-frame depth map at roughly 256×192 resolution. SLAM fuses this LiDAR depth with monocular visual cues from the RGB camera. On non-LiDAR devices, depth comes from motion parallax alone — less reliable, scale-ambiguous, and the reason point cloud fusion benefits enormously from dedicated depth hardware.
5. Geometry Assembly. Aligned depth maps are merged into a coherent 3D structure. For Mesh mode, the system runs surface reconstruction (similar in spirit to Poisson reconstruction) to produce watertight triangle topology. For Point Cloud mode, raw depth samples are retained as colored 3D points in PLY format. This step is where ARKit mesh reconstruction does the heavy lifting.
6. Texture Baking. High-resolution color information from the source video frames is projected onto the 3D geometry. Voxelio's texture pipeline uses keyframe baking — selecting the sharpest, best-lit frame for each surface region — rather than averaging across all frames, which produces blur and washes out detail.
7. Loop Closure. When the camera revisits a previously mapped region, the algorithm detects feature overlap and corrects accumulated drift. Without loop closure, a 30-meter hallway scan can accumulate roughly 1 to 3 percent positional error by the far end.
Apple's ARKit handles stages 1 through 3 with hardware-accelerated Visual-Inertial Odometry that fuses camera, IMU, and LiDAR data at the silicon level. The application layer — modes, export formats, the texture pipeline — is built on top of that foundation.

Choosing Between Mesh, Point Cloud, Pose+Video, and MultiCam
Capture mode is not a quality setting. Each mode produces a fundamentally different data structure, optimized for a different downstream tool. Choosing wrong wastes the capture — you'll get a file that nobody in the workflow can use without conversion, and conversions degrade data.
| Capture Mode | Output File | Best For | Key Limitation |
|---|---|---|---|
| Mesh | OBJ, USDZ (textured) | Architecture, design, e-commerce, AR | Topology simplifies fine detail |
| Point Cloud | PLY (colored) | CV research, dense spatial data | Not viewable in CAD without conversion |
| Pose+Video | HEVC + per-frame poses | NeRF, Gaussian Splatting, SLAM research | No baked geometry — process downstream |
| MultiCam | Merged mesh from passes | Multi-room interiors, building surveys | Requires overlap planning between passes |
The mode you choose isn't about what SLAM can do. It's about what your downstream tool expects.
Mesh mode in detail. Mesh mode outputs textured OBJ and USDZ. USDZ is Apple's universal scene format, viewable directly in Safari, iMessage, and AR Quick Look without an app install. OBJ is universally accepted in Blender, SketchUp, Rhino, Cinema 4D, and most CAD environments. Topology is optimized for shareability — typically 50,000 to 500,000 triangles depending on scene complexity. This 3D model export OBJ USDZ pipeline is the right call for architects sharing as-built captures with clients, designers measuring interiors during schematic design, and e-commerce sellers replacing flat photos with rotatable 3D product views.
Point Cloud and Pose+Video for researchers. Point Cloud mode skips meshing entirely and exports raw colored PLY. This is what computer vision researchers want when they need spatial density without algorithmic surface assumptions baked in — when you're going to run your own segmentation, registration, or classification on the points. Pose+Video is the rarest but most powerful mode for ML pipelines: it exports the original HEVC video alongside frame-accurate camera poses (translation plus rotation per frame). This is the input format for NeRF training, Gaussian Splatting reconstruction, and SLAM algorithm validation — workflows that need to reconstruct geometry from scratch using their own algorithms while having ground-truth camera trajectory to validate against.
MultiCam for scale. MultiCam handles spaces that exceed a single continuous capture — multi-room offices, retail floors, two-story homes, warehouses with structural columns. Each pass is captured independently, then merged using shared overlap regions. The trade-off is planning: capture paths must share at least 1 to 2 meters of textured overlap with adjacent passes, or the merge will fail or produce visible seams.
Where SLAM Hits Its Accuracy Ceiling (And How to Push It Further)
SLAM accuracy is contextual, not absolute. The same algorithm that produces survey-grade results in a furnished office may drift badly in a featureless warehouse. Understanding the failure modes — and the practical mitigations — is what separates a usable scan from a wasted hour. The list below is operational guidance derived from documented SLAM behavior, not benchmarked test data.
- Centimeter-Level Accuracy in Realistic Conditions — In well-lit, texture-rich spaces (offices, furnished rooms, warehouses with shelving and signage), iPhone LiDAR plus ARKit mesh reconstruction consistently delivers spatial precision in the centimeter range when measured against tape-measured references. Accuracy degrades gracefully — you don't get a catastrophic failure, you get a slowly noisier mesh. For most architectural, e-commerce, and design workflows, this is sufficient. For machined-part reverse engineering at sub-millimeter tolerance, it is not, and no LiDAR scanner app on a consumer phone will close that gap.
- Featureless and Reflective Surfaces Break Tracking — Blank white walls, mirrors, large windows, polished concrete, and uniform glossy surfaces give the feature detector nothing to lock onto. The fix is to introduce visual texture: tape printed paper sheets to blank walls, place objects (chairs, boxes, books) along long featureless runs, and avoid capturing mirrors directly — angle around them or accept that the mirrored region will appear as whatever the mirror reflects.
- Motion Discipline Matters More Than Speed — Rapid panning, sudden direction changes, and walking faster than a slow stroll cause the feature tracker to lose lock. Move at roughly 0.3 to 0.5 meters per second. Pivot from the hips, not the wrist — wrist motion introduces high-frequency jitter that the IMU struggles to filter cleanly. When changing direction, pause for half a second before resuming.
- Loop Closure Saves Long Captures — In any capture longer than 10 meters of linear travel, drift accumulates measurably. The remedy is to physically walk a closed loop — return to your starting position before ending the capture — so the algorithm can recognize the revisited region and snap geometry back into alignment. For long hallways without natural loops, capture them in both directions and let overlap detection do the same job.
- Lighting Floor and Ceiling — SLAM does not require studio lighting, but it requires consistent lighting. Avoid mixed conditions where one half of the room is in direct sunlight and the other in deep shadow — the dynamic range crushes either highlights or shadows, killing feature contrast on whichever side loses. Overcast daylight or evenly distributed indoor lighting produces the most reliable captures.
- Thermal and Battery Reality — Sustained ARKit plus LiDAR capture is computationally heavy. Expect 20 to 40 minutes of continuous capture before the iPhone enters thermal management and reduces processing rate. Practical mitigation: capture in 10 to 15 minute sessions, let the device cool for 5 minutes between sessions, and disable background apps. For all-day surveys, carry a spare device.
The only way to know SLAM accuracy for your specific use case is to capture a known reference object — a tape-measured doorframe, a calibration cube, a manufactured part with documented dimensions — and compare exported model dimensions to ground truth. Document this once for your typical capture conditions, and you'll have an error envelope you can rely on for every job after.
SLAM vs. Photogrammetry vs. Laser Scanning — A Working Comparison
SLAM 3D scanning is not always the right answer. It's the right answer when speed, accessibility, and on-device 3D scanning matter more than absolute precision or surface fidelity. Knowing which tool to reach for is more valuable than defending one tool against the others. The comparison below is structured around the operational dimensions that actually drive tool selection on real projects.
| Dimension | SLAM (iPhone) | Photogrammetry | Laser Scanning |
|---|---|---|---|
| Hardware cost | Free app + iPhone 12 Pro+ | Free–subscription app + phone | $15,000–$50,000+ scanner |
| Processing location | On-device, real-time | Cloud (typical) or on-device | On-device + desktop software |
| Output ready in | Seconds after capture | Minutes to hours | Hours to days |
| Best for | Spaces, products, surveys, AR | Detailed objects, archival | Survey-grade BIM, civil, forensic |
| Subscription required | No (Voxelio free) | Often yes for export | Software licenses common |

When SLAM wins. SLAM dominates when the workflow demands speed and accessibility. A real estate agent capturing a listing, an interior designer measuring a client's space, an e-commerce seller producing USDZ models for AR product previews, a maker scanning a workshop for layout planning — none of these need sub-millimeter precision. They need a model in their hands within minutes, exportable in a format their downstream tool accepts, with no per-scan cost. The free-tier model removes the subscription friction that competitors like Polycam introduce for export and cloud features. The on-device 3D scanning pipeline removes the cloud-upload latency that makes photogrammetry workflows feel heavy on a busy day.
When photogrammetry wins. Photogrammetry produces higher surface detail than SLAM when capture conditions are right — even diffuse lighting, a static subject, and 50-plus overlapping photos shot from varied angles. For hero product shots, museum archival captures, or any application where surface texture fidelity matters more than capture speed, photogrammetry's longer processing pipeline is worth the wait. The trade-offs are cloud dependency, processing latency typically running minutes to hours depending on scene complexity, and frequently a subscription gate to access higher-quality outputs or batch exports.
When laser scanning is the only answer. Survey-grade BIM documentation, structural engineering forensics, civil infrastructure surveys, heritage preservation at archival precision — these workflows have tolerance budgets in the millimeter or sub-millimeter range and regulatory documentation requirements that SLAM and photogrammetry cannot meet. Industry-standard terrestrial laser scanners typically range from $15,000 to over $50,000, and the hardware cost is justified by the use case. SLAM is not a replacement here. It's a complement — useful for rapid pre-visit reconnaissance before the laser scanner arrives, or for filling in details the tripod-mounted unit can't reach.
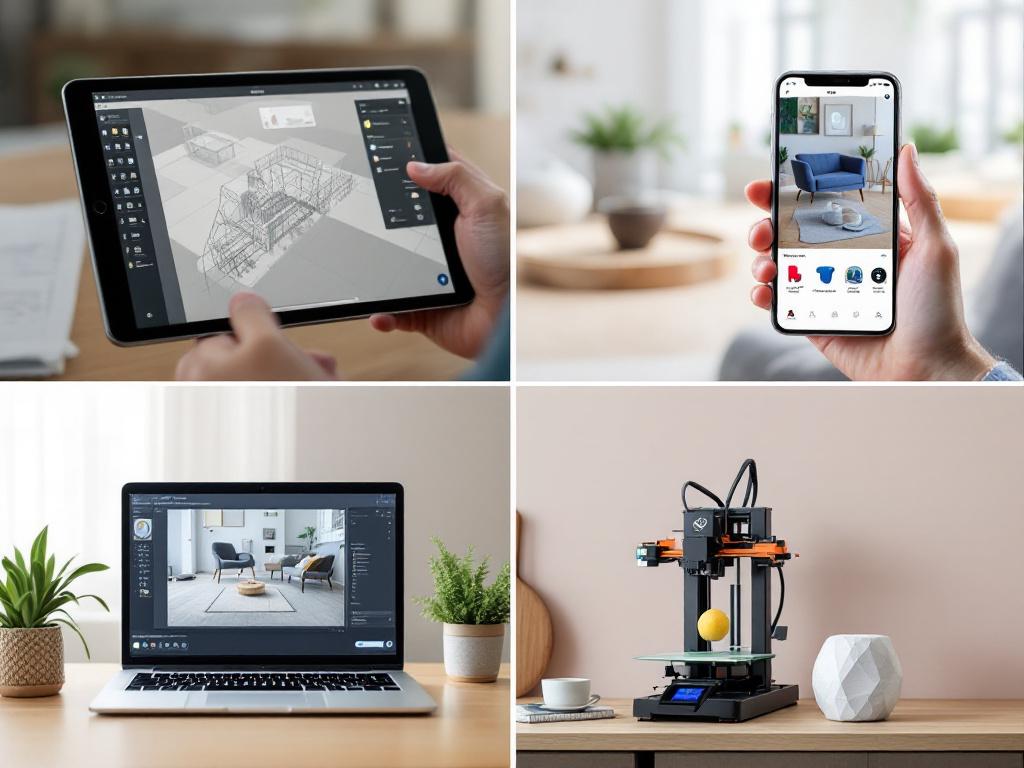
Matching SLAM Capture to Your Profession — Four Workflows
The same SLAM capture engine serves wildly different downstream workflows. The mode, format, and capture discipline you adopt should be driven by what the receiving tool expects — not by personal preference and not by whatever default the app launched in.
- The Architect / Interior Designer Workflow — Use Mesh mode with USDZ plus OBJ export. Capture in 10 to 15 minute room-by-room sessions, walking the perimeter first to establish loop closure, then sweeping interior features. Export USDZ for client-facing AR preview (viewable on iPhone with no app install). Export OBJ for import into SketchUp, Revit, or Rhino, where the mesh becomes a reference layer for drafting clean orthographic plans, sections, and elevations. Document floor-level horizontal references with a tape measure or laser distance meter for scale validation. Practical tolerance: centimeter-level is sufficient for as-built documentation, schematic design, FF&E planning, and spatial documentation for accessibility audits.
- The E-Commerce Seller Workflow — Use Mesh mode, USDZ export. Capture products on a textured non-reflective surface (matte fabric, wood grain) in even diffuse light — overcast daylight or a softbox setup. Move slowly around the product at 360 degrees, capturing top-down and three-quarter angles. The 3D model export OBJ USDZ pipeline lets you embed USDZ directly in Shopify product pages with AR Quick Look, or convert USDZ to glTF for broader web compatibility (Three.js, React Three Fiber, model-viewer). The result: shoppers rotate and AR-place your product in their living room instead of staring at flat photos. Skip MultiCam unless your product is larger than 1 meter on any axis.
- The CV / Robotics Researcher Workflow — Use Pose+Video mode for the highest-value research data. The HEVC video plus per-frame camera poses is ground truth for SLAM algorithm validation, NeRF training, and Gaussian Splatting reconstruction — and ARKit's hardware-fused VIO produces poses that are difficult to match with consumer hardware otherwise. Use Point Cloud mode (colored PLY) when you need raw spatial density for downstream segmentation, classification, or registration tasks. Capture diverse trajectories — straight lines, loops, varied heights — to avoid overfitting downstream models to a single motion pattern. Validate exported pose accuracy against a known fiducial-marker setup before incorporating captures into a training pipeline.
- The Maker / 3D-Printing Hobbyist Workflow — Use Mesh mode, OBJ export. Capture the source object on a turntable or with a slow walk-around, then import the OBJ into Blender or Meshmixer for cleanup: remove background geometry, fill holes, decimate to a printable triangle count (typically 50,000 to 200,000 for FDM, higher for resin). Export STL from your mesh editor and slice in PrusaSlicer, Cura, or Bambu Studio. For accurate scale-to-print, capture a known reference dimension (a ruler in-frame or a calibration block) and confirm scale in your slicer before committing filament.
With the workflow matched to your profession, the next step is the pre-capture, in-capture, and post-capture discipline that makes the difference between a usable scan and a wasted session.
The SLAM Capture Field Checklist
This is the operational discipline that separates a clean scan from a re-shoot. Run through it once before every capture until it becomes automatic. Print it, save it to your Notes app, or screenshot it for the field.
Before You Capture
- Confirm device compatibility. iPhone 12 Pro, 13 Pro, 14 Pro, 15 Pro, 16 Pro, or any iPad Pro with LiDAR. Non-Pro iPhones lack the LiDAR sensor and produce noticeably less reliable depth fusion.
- Choose your capture mode based on the receiving tool. Mesh for design and e-commerce, Point Cloud for research density, Pose+Video for ML pipelines, MultiCam for spaces too large for a single pass.
- Check available storage. A typical 5-minute Mesh capture is 200 MB to 1 GB. Pose+Video can run 3 to 5 GB. Confirm at least 5 GB free before starting.
- Audit lighting. Avoid mixed direct sun plus deep shadow. Overcast daylight or even indoor lighting is ideal. Close blinds against window glare if needed.
- Stage the scene. Remove obvious moving elements — rolling chairs in motion, pets, people walking through. Static people in the scene are tolerated; moving ones cause artifacts.
- Plan the capture path. Identify a starting point in a textured corner. Map a route that returns to the start (loop closure). For multi-room: plan overlap zones between passes.
During Capture
- Move at a slow walking pace. Roughly 0.3 to 0.5 meters per second. Faster than a slow stroll loses tracking.
- Hold the phone steady, pivot from your body. Wrist motion introduces high-frequency jitter. Body rotation produces smoother trajectories.
- Watch the live mesh preview. If you see holes or jitter forming during real-time 3D capture, slow down and re-capture that area before moving on.
- Capture corners and edges deliberately. These are where the mesh stabilizes. Linger on them for 2 to 3 seconds.
- Avoid pointing the camera at mirrors, large windows, or polished glass directly. Approach them at oblique angles or skip them and patch the geometry post-capture.
- Close your loop. Return to your starting position before ending the capture. This is what triggers drift correction.
After Capture
- Review the in-app preview before exporting. Spin the model. Look for holes, distorted geometry, or gaps. Re-capture problem areas using MultiCam if needed.
- Choose the right export format. USDZ for AR and iOS sharing, OBJ for CAD and 3D editors, PLY for research point clouds, HEVC plus pose JSON for ML pipelines.
- Validate scale against a known reference. Measure a known dimension in the exported model — a doorframe, a ruler in-frame. Confirm it matches reality within your tolerance.
- Document the capture metadata. Date, device model, capture mode, lighting conditions, total capture duration. This is invaluable for repeatability and debugging future failed captures.
- Back up the raw export. Cloud storage, external drive, or version-controlled repo. Re-capturing is always more expensive than storing.
- Hand off in the format the receiving tool expects. Don't send an architect a PLY. Don't send an ML researcher a USDZ. The right format is half the value of the capture.
Frequently Asked Questions About SLAM 3D Scanning
Does SLAM 3D scanning work outdoors? Yes, with caveats. Indoor SLAM is the strong case because LiDAR has a practical depth range of roughly 5 meters and feature-rich surfaces are abundant. Outdoors, distant geometry — buildings across a parking lot, trees beyond LiDAR range — won't capture cleanly, and direct sunlight can wash out feature contrast. For outdoor captures, work in overcast conditions and keep subjects within 5 meters of the camera.
Can I merge multiple SLAM captures into one model? Yes, this is exactly what MultiCam mode is for. Capture each section of a large space as a separate pass with at least 1 to 2 meters of textured overlap between adjacent passes. The app merges them into a single mesh during export. For passes that don't overlap, manual alignment in a tool like CloudCompare or MeshLab is required after export.
What happens if my iPhone overheats during capture? ARKit reduces processing rate when the device hits its thermal limit, typically after 20 to 40 minutes of continuous capture. The capture doesn't fail catastrophically — it degrades. Practical mitigation: split long captures into 10 to 15 minute sessions with 5-minute cooldowns, disable background apps, and avoid direct sunlight on the device body. A silicone case can actually trap heat; remove it for long sessions.
How accurate is iPhone SLAM compared to a professional laser scanner? Different tolerance classes entirely. An iPhone-based LiDAR scanner app delivers centimeter-range precision suitable for architectural as-built documentation, design, e-commerce, and most maker workflows. Terrestrial laser scanners (Leica, FARO) deliver sub-millimeter precision required for survey-grade BIM, structural forensics, and regulatory documentation. For those use cases, SLAM is a complement for reconnaissance, not a replacement for the tripod scanner.
Is the app actually free, or does export require a subscription? Genuinely free. All four capture modes — Mesh, Point Cloud, Pose+Video, MultiCam — and all export formats (OBJ, USDZ, PLY, HEVC plus poses) are included with no subscription, no ads, and no per-scan limits. This on-device 3D scanning model is a deliberate positioning choice against subscription-gated competitors that charge per export, per cloud minute, or per resolution tier.