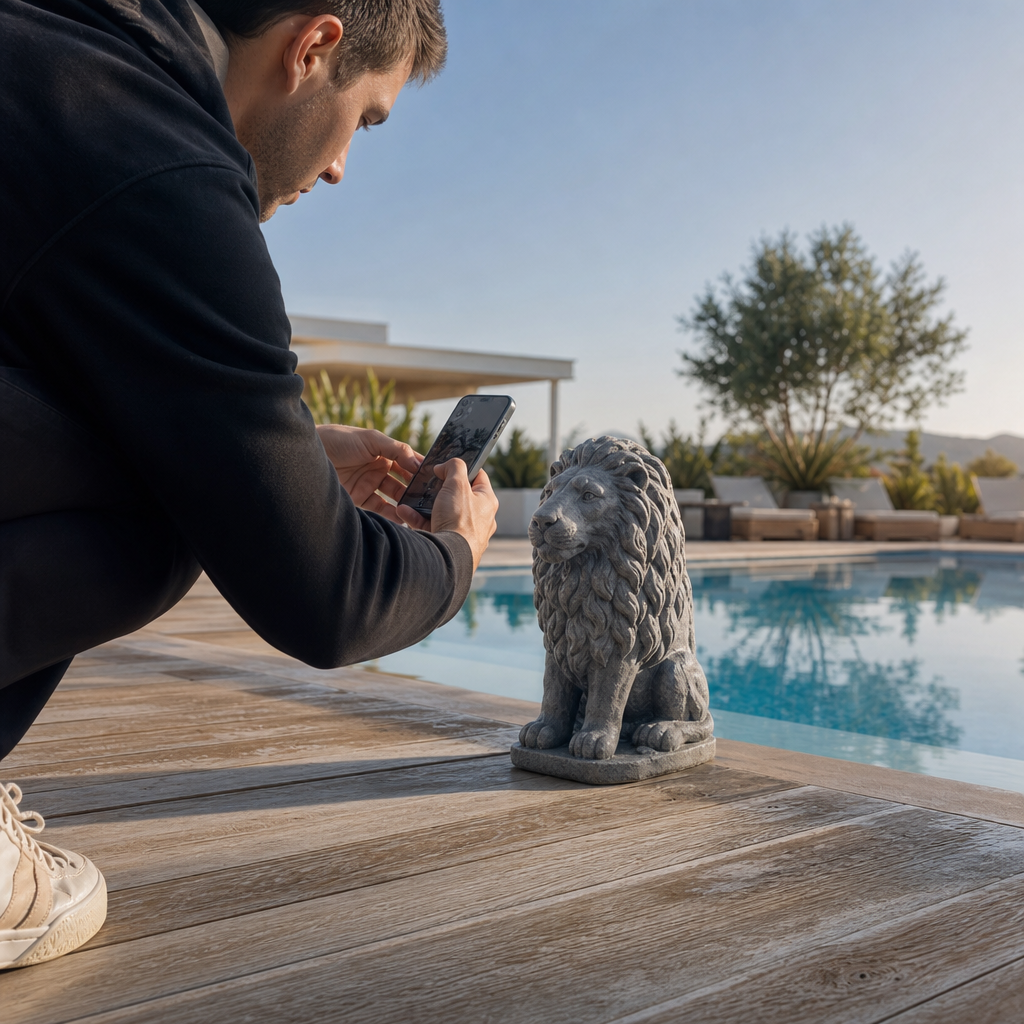
You can turn a real object into a shareable, textured 3D model with nothing but a LiDAR iPhone, Voxelio, and roughly 10 to 20 minutes of focused work. Because Voxelio reconstructs everything on-device, there are no subscriptions or per-scan fees, so once you own a supported iPhone the only real cost of learning how to 3D scan an object with iPhone is your time and a little practice. This walkthrough covers the full path with Voxelio, from the checks you run before you start to the exact mesh, point cloud, or pose-and-video files you hand off to your CAD, e-commerce, or research pipeline.
Table of contents
Prerequisites checklist
Before your first scan, confirm you have the hardware, software, and scene conditions that let ARKit do its job. Skipping these is the most common reason a first attempt comes out warped or full of holes.
Hardware
- An iPhone with LiDAR (iPhone 12 Pro or a later Pro model, or a supported iPad Pro) so ARKit can reach the depth sensor. Standard non-Pro iPhones without LiDAR cannot run our LiDAR capture modes.
- Battery at roughly 40 to 50 percent, and not tethered to a short cable, so you can circle the object freely.
- Enough free storage. High-quality object scans and their exports can reach hundreds of megabytes.
- Optional but helpful: a phone grip or tripod clamp for steadier motion, and a turntable for small objects so you can spin the object instead of walking around it.
Software
- Voxelio installed from the App Store.
- Current iOS updates applied, so you have the latest ARKit and LiDAR improvements.
Object and environment
- An object that is at least hand-sized. Very tiny objects do not resolve well with mobile LiDAR.
- Mostly matte or semi-matte surfaces. Glass, chrome, and transparent parts are problematic because the infrared beam passes through or bounces away from the sensor.
- Something that stays perfectly still for the whole capture.
- A clear path so you can walk a full circle without bumping furniture, with at least 2 to 3 ft (60 to 90 cm) of clearance around the object.
- Even, diffuse lighting with no harsh spotlights, and no scanning directly into bright windows.
- A calm background with no people or pets moving through the scene.
Step-by-step object scan with Voxelio
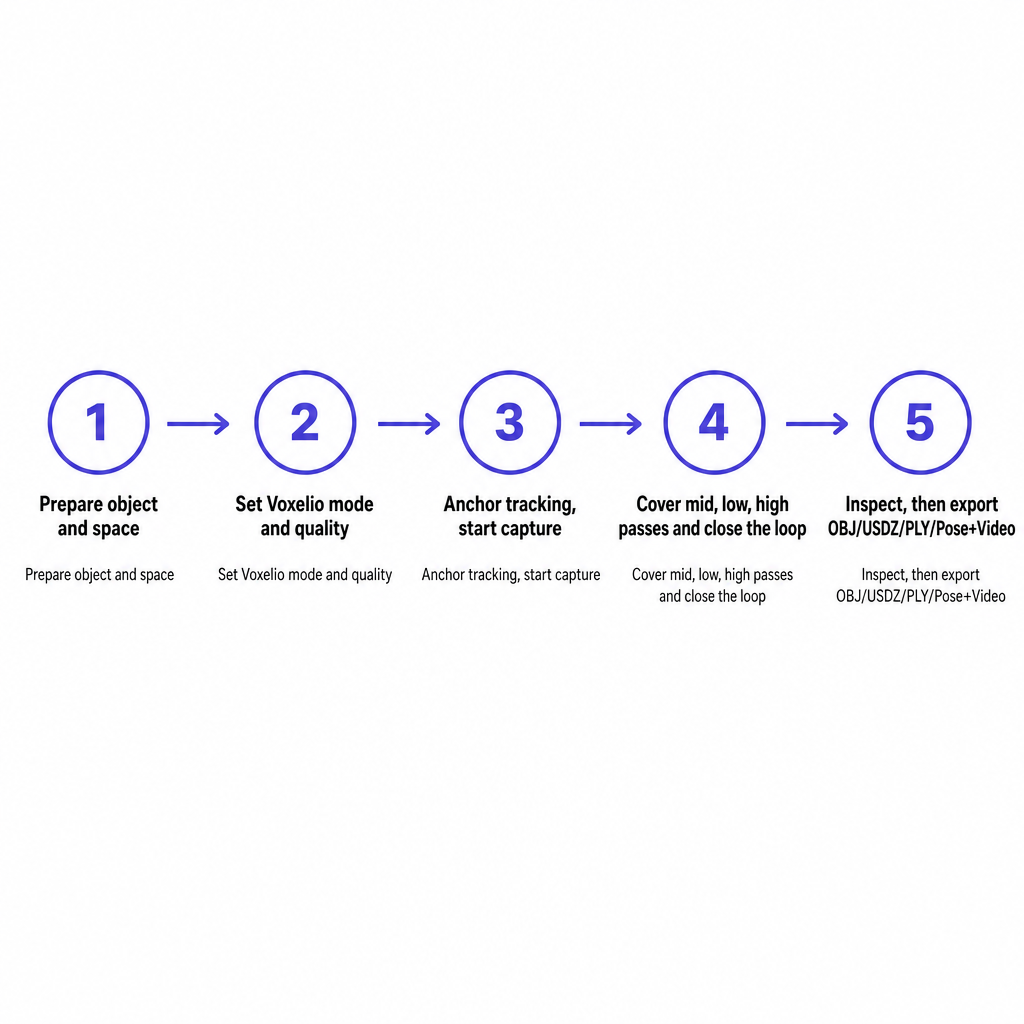
The workflow below is one continuous loop: prepare, configure, track, cover every angle, inspect, and export. Run a fast low-quality test first, then repeat at higher quality once your path and pace feel natural.
1. Prepare your object and space
Set the object on a table or pedestal with clear space on all sides. Simplify the background to a plain floor or backdrop so ARKit can lock onto stable geometry and return a cleaner mesh. If the object has glass, chrome, or glossy black areas, cover them with removable matte tape, paper, or a temporary coating so the LiDAR signal does not scatter unpredictably. Use indirect, soft light that avoids hard shadows and blown-out highlights, and remove anything that might move mid-scan, such as loose cables or a curious pet.
2. Set up Voxelio for object capture
Launch Voxelio and confirm LiDAR is available; we only enable LiDAR capture modes on supported iPhone and iPad Pro devices. Then choose the capture mode that matches your downstream use:
- Mesh produces textured OBJ/USDZ meshes for AR, product pages, real-estate visuals, and 3D printing references. For most single-object projects, start here.
- Point Cloud produces colored PLY point clouds aimed at CAD, BIM, and engineering work.
- Pose+Video produces camera pose data plus HEVC video for NeRF, SLAM, or photogrammetry pipelines.
- MultiCam handles research setups that need synchronized multi-camera capture and pose data.
Pick a quality preset next. A low or mid setting is right for your first test; move up to a maximum setting for presentation-grade detail and textures once the workflow feels routine. Finally, decide your export target in advance: USDZ or textured OBJ for AR and web, PLY or OBJ for CAD and BIM, and Pose+Video when you need camera trajectories alongside the footage.
3. Establish tracking and start your scan
Stand about 1 to 3 m (3 to 10 ft) from the object and hold the phone steady for a moment so ARKit can anchor to the floor and surrounding surfaces before you tap to record. Once you start, move like you are painting the surface with the LiDAR beam: slow, overlapping passes beat quick sweeps. A walking speed around 1 m/s or slower helps ARKit fuse frames into a dense, low-noise mesh, and staying within the sensor's effective range, typically up to about 5 m, keeps depth measurements reliable. Hold a roughly constant distance and adjust your path rather than lurching in and out, since sudden jumps in distance or orientation introduce warping.
4. Cover every angle and close the loop
Start with a full circle at about chest height, keeping the main features centered. Then crouch for a low pass to capture the base and any undercuts, and raise the phone above the object, tilted down, to reach top surfaces and recesses. Each pass should overlap the last so ARKit can reuse shared geometry and avoid seams. Watch Voxelio's live reconstruction view as you go; it renders coverage in real time, so you can spot holes or thin areas and revisit them before stopping. Ending near your original viewpoint closes the loop, which helps ARKit reconcile the start and end of the trajectory and reduces drift. When coverage looks complete, stop the scan and let Voxelio fuse the point cloud and bake keyframe textures on-device, usually within seconds to a couple of minutes depending on your quality setting.
5. Inspect, refine, and export
Orbit the finished model in Voxelio's viewer and check for holes, wavy or melted areas, and blurry or stretched textures. Mobile LiDAR pipelines like ours typically achieve centimeter-level spatial precision at moderate speeds with a well-planned trajectory; if exact scale matters for fabrication or reverse-engineering, measure one real-world dimension and verify it against the model in your downstream tool. Expect to rescan occasionally as you learn a good route. A second or third pass, after refining your path and lighting, tends to be dramatically cleaner.
When the model holds up, export the format your workflow needs: OBJ or USDZ with baked textures for AR and visualization, PLY point clouds for CAD, BIM, and further meshing, or Pose+Video for NeRF and SLAM datasets. Adopt a clear naming convention such as object_name-date-version, and keep the original Voxelio scan files beside your exports so you can re-export at a different resolution later. If you want to see how this same capture discipline scales up, our guide on creating a building 3D model with iPhone LiDAR applies the same principles to full rooms and structures.
Common mistakes and how to fix them
Most failed object scans trace back to a handful of fixable causes. Diagnose by symptom.
The model looks warped or melted. This usually means you moved too fast, changed speed or direction abruptly, or ARKit lost tracking on a low-feature or reflective surface. Slow down into steady overlapping passes, add visual texture near featureless areas so ARKit has something to lock onto, and keep glossy floors and mirrors out of the scan volume or cover them temporarily.
Parts are missing or full of holes. You likely skipped top, bottom, or undercut angles, or stopped before returning to your start. Plan at least three passes, mid-height, low, and high, watch the live mesh to fill gaps before stopping, and rescan with a better route if a major section is absent.
Textures are dark, noisy, or blurry. Poor or uneven lighting and strong highlights are the usual culprits. Add diffuse light by bouncing it off walls or a ceiling, keep the camera off bright windows and light sources, and knock down shiny surfaces with temporary matte coverings.
Reflective or transparent areas don't reconstruct at all. LiDAR struggles with glass and mirror-like surfaces because the infrared beam passes through or reflects away. Cover those areas with matte tape, removable paint, or paper. For clear glassware where you need perfect geometry, accept that a separate photogrammetry workflow may be the better tool.
The phone overheats or the app slows down. Long continuous scans at maximum quality, plus high ambient heat or direct sun on the device, are the drivers. Keep individual scans short and focused, let the phone cool between takes, and reserve the maximum setting for final captures only.
DIY versus professional scanning: where to draw the line
An iPhone with LiDAR and Voxelio is a capable 3D scanner in your pocket, with centimeter-scale accuracy and no hardware cost beyond the phone you already own. That makes it a strong fit for 3D printing references and props, e-commerce product models and USDZ/OBJ store assets, AR previews, interior design and concept visualization, and CV or robotics research that needs LiDAR geometry and camera pose data as training or evaluation sets.
There are limits worth respecting. Some work calls for survey-grade equipment and, often, a licensed professional:
- Regulated or safety-critical work, such as structural assessments or load-bearing elements, where a measurement error could cause harm or legal liability.
- Legal or contractual deliverables, such as property boundary surveys or as-built documentation that must meet a codified standard or carry a professional's stamp.
- Very large or complex environments, such as industrial plants or infrastructure corridors, where line-of-sight gaps, GNSS integration, or millimeter tolerances are required.
A practical rule: if the output needs a professional seal, drives a regulatory decision, or could expose you to liability, use Voxelio as a visual and planning tool and rely on a licensed professional for final measurements and sign-off. For everything else, iterate a few times and you will have a repeatable process that turns everyday objects into precise, textured 3D assets. If you are still deciding whether mobile LiDAR fits your needs, our beginner's guide to 3D scanners and our explainer on how LiDAR scanning works on iPhone cover the fundamentals.
Frequently asked questions
Which iPhones support Voxelio's LiDAR object scanning?
Voxelio uses Apple's LiDAR scanner through ARKit, which Apple ships on Pro-class iPhones starting with iPhone 12 Pro, plus specific iPad Pro models. Standard non-Pro iPhones without LiDAR cannot run LiDAR-based capture modes.
How accurate are iPhone LiDAR object scans?
Scanning at walking speed, staying within about 5 m, and planning a clean trajectory, mobile LiDAR pipelines like ours reach centimeter-level accuracy, generally in the 1 to 10 cm range depending on scene complexity and motion. That is enough for visualization, AR, and many fabrication references, but not a substitute for survey-grade instruments where millimeter tolerances are mandatory.
Can I 3D print from a Voxelio scan?
Yes. Export OBJ or PLY, bring it into your CAD or mesh-editing tool to clean the geometry and confirm scale, then generate an STL for printing. Expect some mesh repair such as closing holes and simplifying topology, as with most scan-to-print workflows.
What file formats does Voxelio export?
Voxelio outputs textured OBJ and USDZ meshes, colored PLY point clouds, and, in Pose+Video mode, HEVC video with frame-accurate camera poses. That covers pipelines from AR and visualization through CAD/BIM and NeRF or SLAM research.
Do my scans leave the device?
Our reconstruction is designed to run entirely on-device, using ARKit mesh reconstruction, spatial point-cloud fusion, and keyframe texture baking without uploading frames to a server. That keeps latency low, leaves your capture data under your control, and removes recurring cloud-processing fees.