How to Create a Building 3D Model with Your iPhone LiDAR Scanner
You are standing in an empty listing before a client walkthrough, or inside a facade you need to document, phone already in hand. You've heard iPhone LiDAR is "good enough" — but a building 3d model is unforgiving. A few centimeters of drift ruins a floor plan, misaligns a wall, or breaks a CAD import. The alternative is a $20K terrestrial laser scanner or a full day with a tape measure. The sensor in your pocket wants to replace both.
Here's the honest version. This is a repeatable, entirely on-device workflow that produces a dimensionally usable building 3d model — no cloud upload, no subscription — with candid guidance on where an iPhone LiDAR scanner delivers and where it falls short. Comparative iPhone 13 Pro building documentation studies show building-scale errors clustering in the 10–20 cm range at 95% confidence, according to 3Dmag. But careful repeated passes over a large space have stabilized accuracy to a mean of 2 cm with 92% of distances under 5 cm, per a peer-reviewed evaluation in Scientific Reports. The difference between those two numbers is technique. That's what this guide teaches.
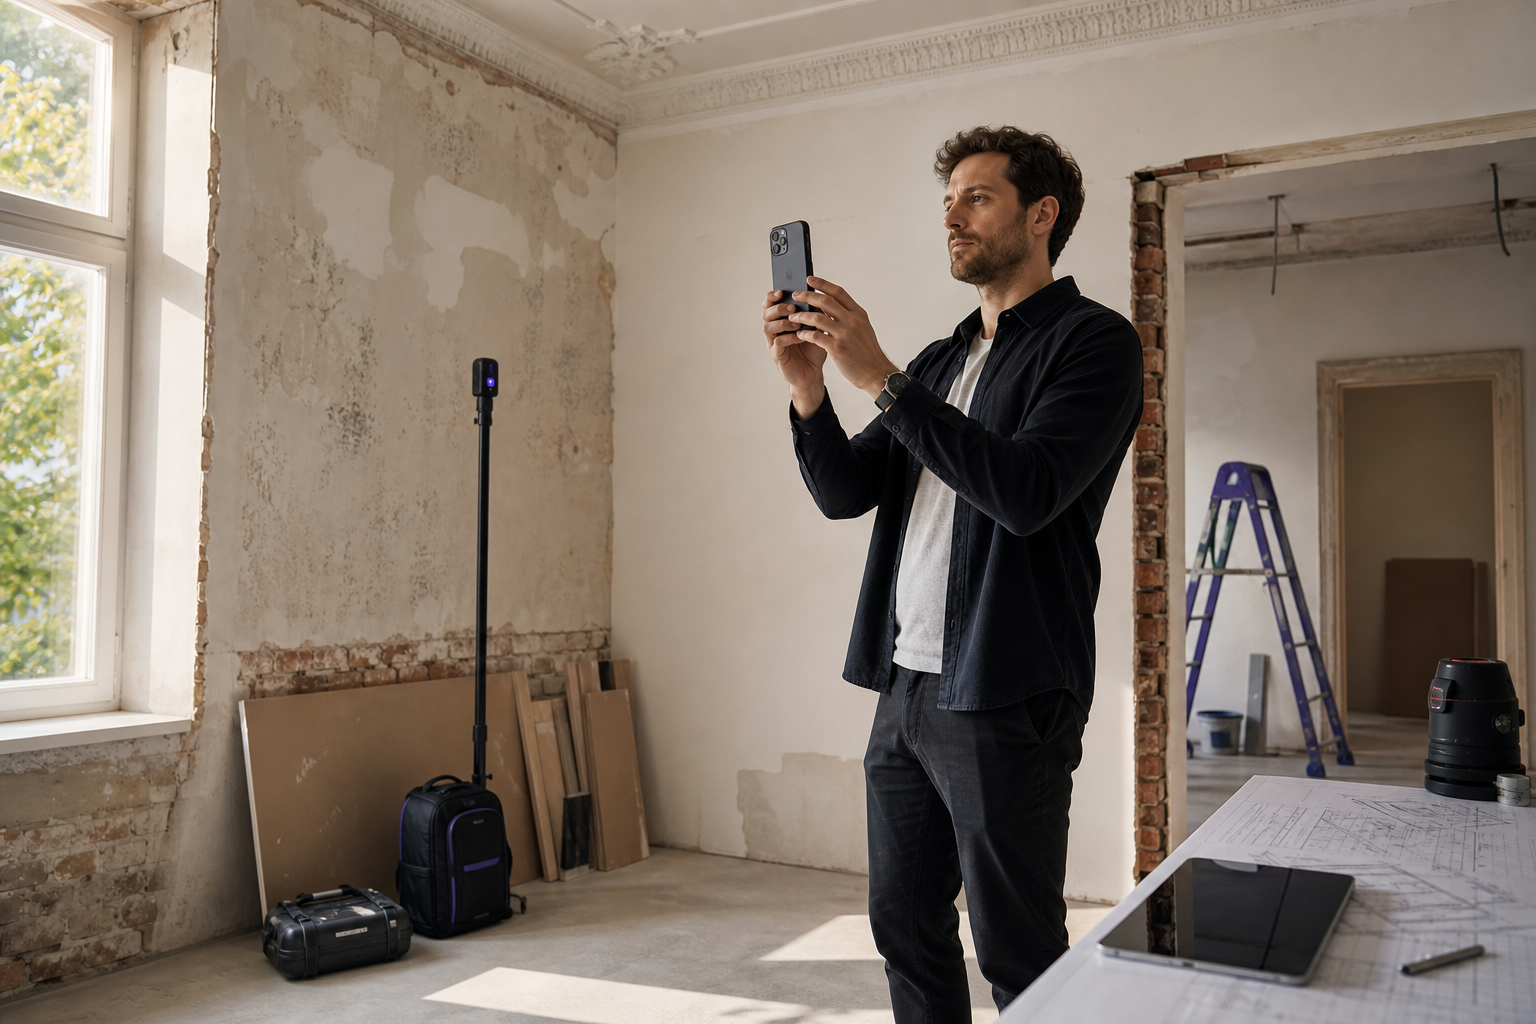
Table of Contents
- What iPhone LiDAR Can (and Can't) Capture at Building Scale
- Choosing the Right Capture Mode for Your Building Project
- Preparing the Site and Your Device Before You Scan
- Step-by-Step: Scanning a Building
- Exporting Your Model: OBJ, USDZ, PLY, and What Each Is Good For
- Cleaning Up and Using Your Building Model in CAD, AR, and Beyond
- Common Building-Scan Problems and How to Fix Them
- Building 3D Model FAQ: Accuracy, Coverage, and Requirements
What iPhone LiDAR Can (and Can't) Capture at Building Scale
Before you burn a scan session, calibrate your expectations against four hard facts. They determine whether your building 3d model ends up in a CAD import or in the trash.
Effective range is roughly 5 meters. Apple's LiDAR measures distance up to about 5 m, per 3Dmag summarizing Apple's specifications. The practical consequence is blunt: you cannot stand across the street and scan a whole building. You cannot capture a 12-meter ceiling from the floor. You have to walk the structure in overlapping passes, staying inside that range the entire time. Anything past 5 m returns degraded or absent depth data, and the tracking starts guessing.
Accuracy scales inversely with size. This is the number most people never learn until a floor plan comes back wrong. In the Scientific Reports evaluation of the iPhone 12 Pro LiDAR, models of small objects with side lengths over 10 cm hit ±1 cm absolute accuracy, while a coastal cliff model up to 130 m long reached only ±10 cm, according to Scientific Reports. At building documentation scale, comparative workflows land in the 10–20 cm error range at 95% confidence (3Dmag). The reason is structural: ARKit mesh triangulation overcomes size limits at larger scales, but it sacrifices geometric accuracy to do it, as the Scientific Reports authors note directly. The bigger the thing you scan, the more the software fills gaps with reasonable guesses instead of measured points.

Drift is the enemy on long runs. Long facades and large open interiors accumulate error because tracking leans on the phone's inertial sensors between geometric anchors. One practitioner documenting existing buildings reported ±2" (~5 cm) errors and noticeable drift on longer scans, warning it's "not good enough for MEP design work," in a Reddit r/Revit discussion. That's the failure case. The success case comes from the same physics handled differently: repeated overlapping passes over a 10 × 15 × 10 m area produced a mean 2 cm deviation with 92% of distances under 5 cm (Scientific Reports). Same sensor, opposite outcome. The variable is discipline.
A building isn't scanned in one heroic sweep — it's assembled from disciplined, overlapping passes that never let the tracking guess.
Not every building job is equally feasible. Sort your project into one of three tiers before you start. Single-room capture is the most reliable — a small room sits comfortably inside the 5 m range and closes its own loop naturally. A full interior walkthrough is feasible with disciplined loop closure, connecting each room through doorways and hallways. A long exterior facade is the hardest case: it's the most drift-prone, offers the fewest natural anchor points, and almost always needs segmentation into overlapping chunks that you stitch afterward.
You need the right hardware. This workflow requires an iPhone 12 Pro or later — the Pro-series models that carry the LiDAR sensor. If you're weighing whether the phone in your pocket can replace dedicated gear, the case for the cheapest 3D scanner already being in your pocket is strong, but only on qualifying hardware. Standard (non-Pro) iPhones lack the sensor entirely.
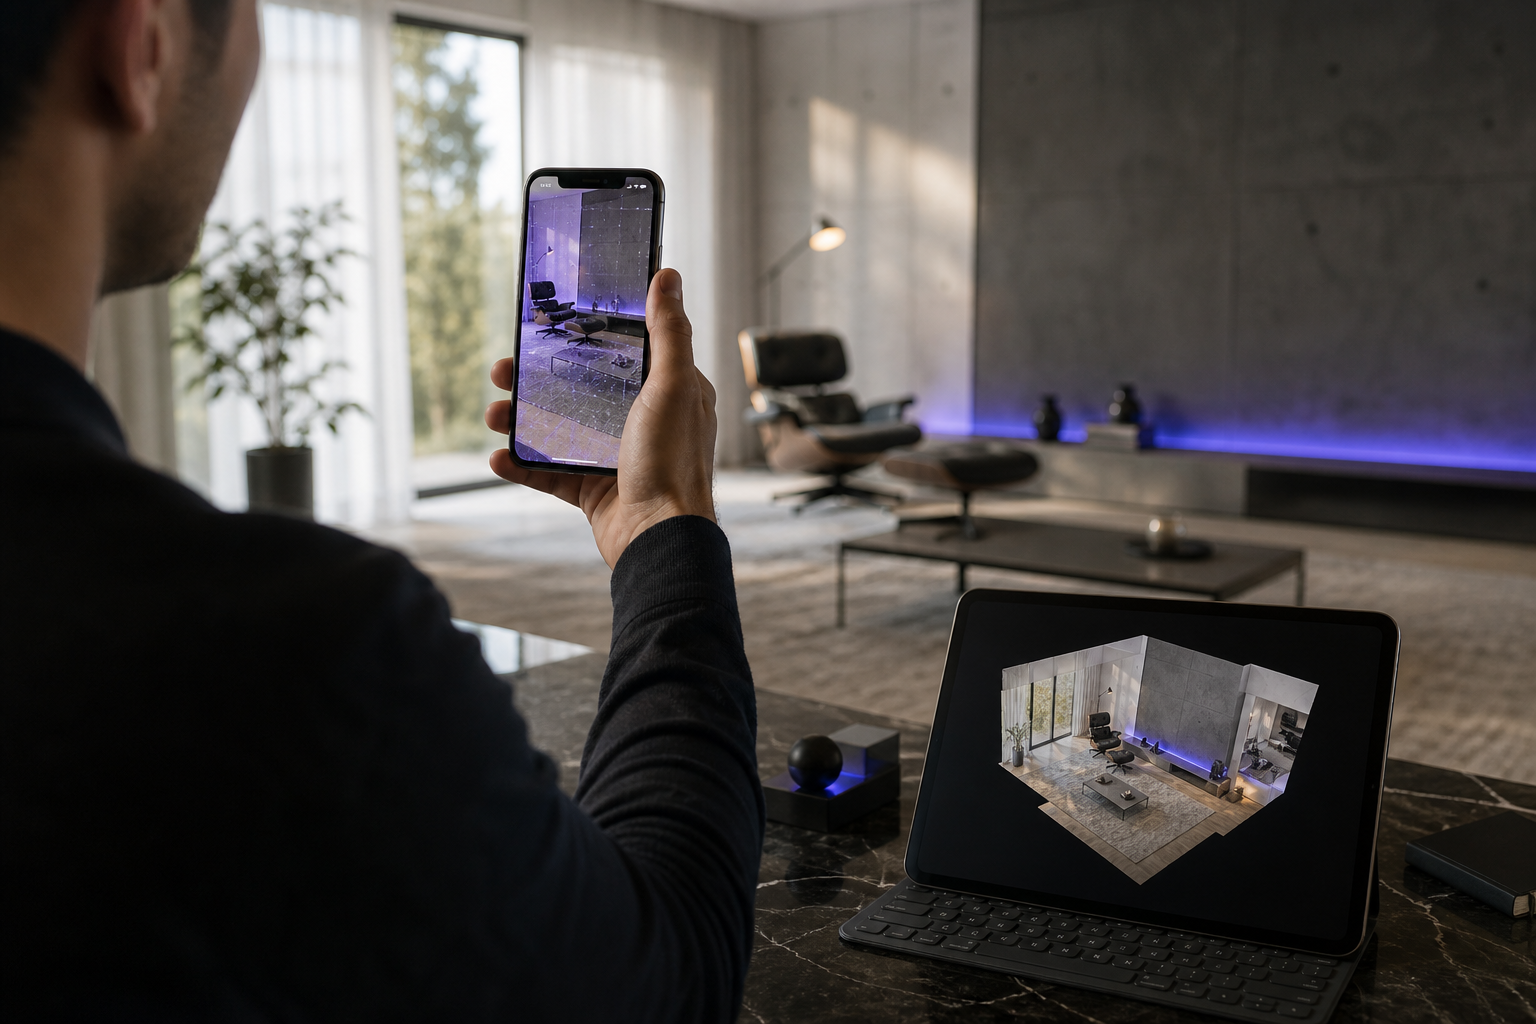
One preview before the next section: you'll choose between a mesh and a point cloud as your core output. Mesh gives you continuous surfaces for visualization; point cloud preserves raw spatial positions for measurement. Which one you pick depends entirely on what you're delivering.
Choosing the Right Capture Mode for Your Building Project
Voxelio offers four capture modes, and picking the wrong one wastes the entire session. Match the mode to your end deliverable, not to what looks impressive on-screen.
| Capture Mode | Primary Output | Best Building Use Case | Precision Tradeoff | Relative File Weight |
|---|---|---|---|---|
| Mesh | Textured OBJ / USDZ | Visualization, AR walkthroughs | Smoothed geometry, softened edges | Medium |
| Point Cloud | Colored PLY | CAD import, measurement | Raw points, no surfaces to render | High |
| Pose+Video | HEVC + camera poses | NeRF / SLAM / photogrammetry | Requires downstream reconstruction | High |
| MultiCam | Fused capture (mesh/cloud) | Large multi-zone coverage | More alignment complexity | Highest |
Mesh produces textured OBJ and USDZ continuous surfaces — the kind of model you can render, walk a client through, or drop into an AR preview. The tradeoff is baked into the format: ARKit triangulation smooths geometry, so fine detail and hard edges soften. A crisp door reveal or a sharp cornice will read as slightly rounded. That's acceptable for visualization and unacceptable for a dimensioned drawing.
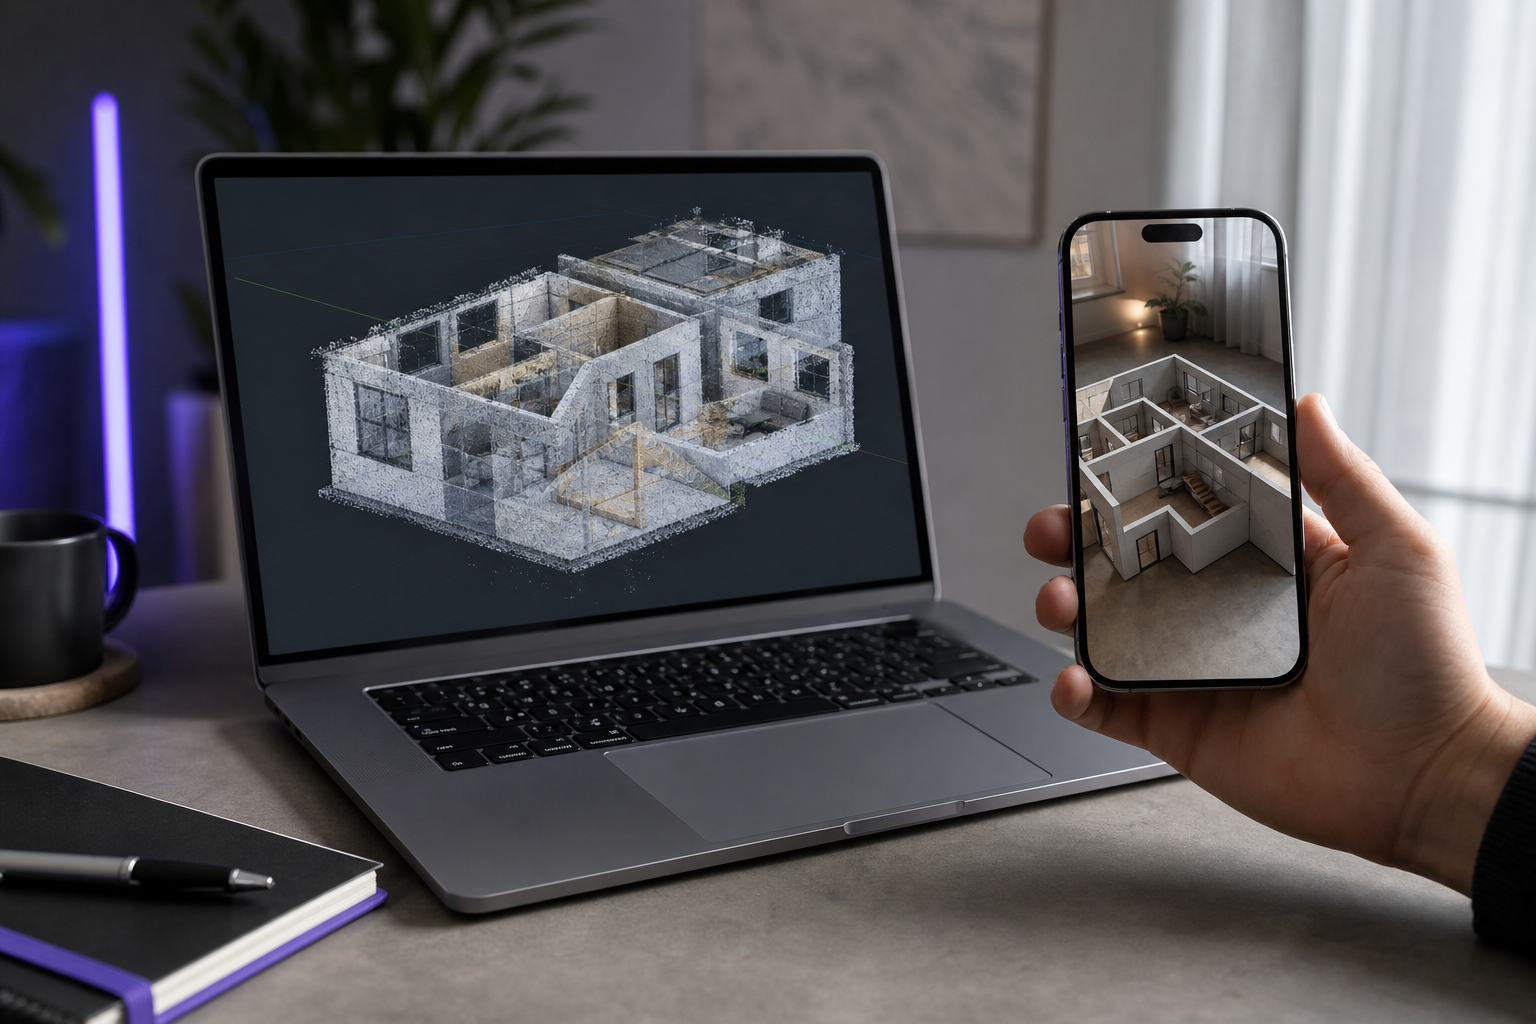
Point Cloud captures a colored PLY of discrete spatial points — no triangulation, no surface smoothing. This is your measurement format. Because each point holds its raw measured position, a point cloud is the honest record of where surfaces actually are, which is why it's the right underlay for CAD import and as-built reference. The cost is that there are no surfaces to render, so it looks like a dense fog of dots until you convert it. If you plan to build watertight geometry from it, the point cloud to mesh conversion path is its own discipline worth understanding before you scan.
Pose+Video records HEVC video plus frame-accurate camera poses. This mode isn't for people who want a finished model handed to them — it's for CV and robotics researchers who reconstruct geometry themselves. The frame-accurate poses are the payload; they let a NeRF, SLAM, or photogrammetry pipeline solve the reconstruction with known camera positions instead of estimating them.
MultiCam coordinates multi-capture for broader spatial fusion, useful when a single walkthrough can't cover the footprint — a multi-wing building, a large open floor plate, or any space where one continuous pass would drift before you finished. It buys coverage at the cost of more alignment complexity.
The decision collapses to a single question about your deliverable. Need a floor plan or precise measurements? Point Cloud. Need a client-facing render or a listing model? Mesh or USDZ. Feeding a NeRF or SLAM pipeline? Pose+Video. Covering a large multi-zone footprint? MultiCam. Every one of these outputs is generated on-device — nothing leaves the phone to get processed.
Preparing the Site and Your Device Before You Scan
Path planning is the single biggest quality lever you control. LiDAR room-mapping best practice is to move in a logical sequence — clockwise around open areas, room-to-room through a floor — so each new pass shares reference geometry with the last, according to Matterport. Everything below serves that principle.
- Plan your walking path first. Decide clockwise or room-to-room before you press record. Identify doorways, corners, and stairwells as your alignment anchors ahead of time (Matterport). A planned route is what turns a series of passes into one coherent model instead of a pile of drifting fragments.
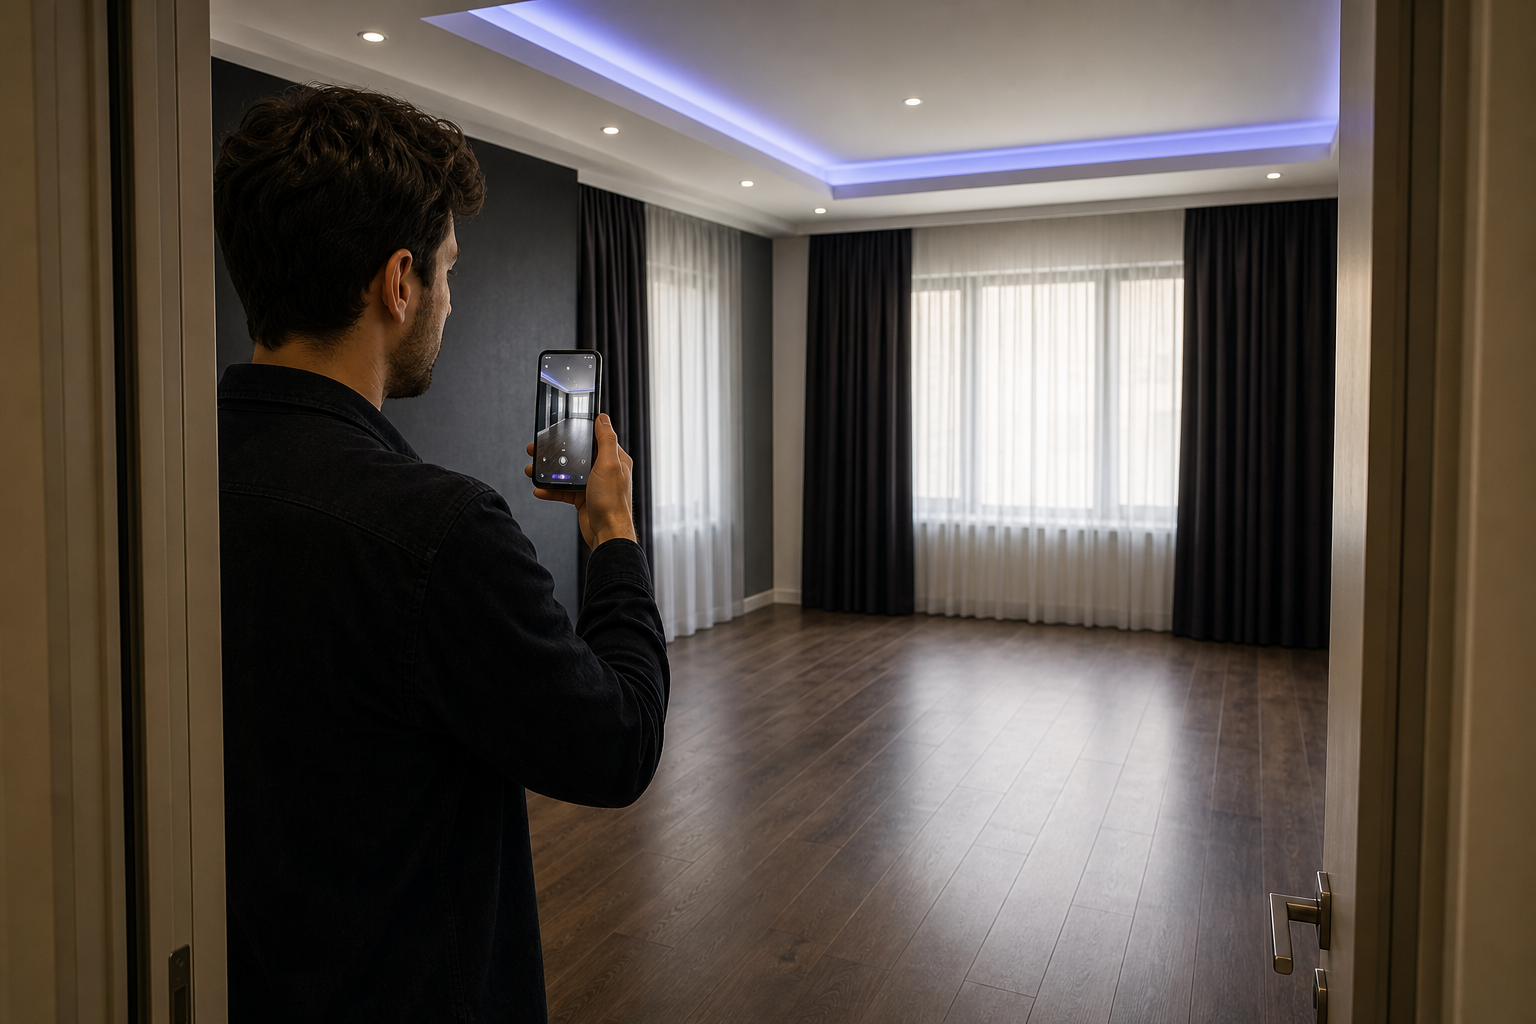
- Use even, diffuse lighting. LiDAR is active-depth, so it works in low light — but the RGB texture pass that colors your model needs consistent light. Avoid harsh backlight and blown-out windows, which leave dark or washed-out texture on surfaces the depth sensor otherwise captured fine.
- Clear clutter and moving obstacles. Remove people, pets, and anything you don't want fused permanently into the mesh. Depth-map resolution is limited, and a Chief Architect user group post on iPhone LiDAR floor plans notes that obstacles and roughly 300-pixel depth resolution make scans "very inaccurate" if the space isn't controlled first.
- Neutralize reflective and glass surfaces. Mirrors and glass ghost the scan by bouncing the depth signal into phantom geometry. Close blinds, cover mirrors, or plan to scan around them and trim the artifacts later.
- Give yourself battery and thermal headroom. Long continuous scans throttle the phone as it heats. Start at a high charge and plan to segment large buildings rather than forcing one marathon session.
- Confirm free storage space. Point clouds and textured meshes are heavy files. Verify you have gigabytes free before you start — running out mid-scan on a large interior loses the run.
- Mark your scan start and end. Choose a start point you can physically return to. Loop closure — binding the end of the scan back to its beginning — depends on it, and it's the technique that suppresses the drift described earlier.
Step-by-Step: Scanning a Building
This is the core workflow to scan a building into a usable model. Every step maps to a specific movement or behavior. Follow the sequence.
- Launch Voxelio and select your mode. Pick Mesh, Point Cloud, Pose+Video, or MultiCam based on the deliverable you settled on in the mode decision above. Changing your mind mid-scan means starting over.
- Establish a tracking anchor. Hold still at your marked start point and let ARKit lock onto stable geometry — a corner, a doorframe — before you move. This seeds the coordinate frame the entire scan hangs on. Move too soon and you're building on a foundation the software never confirmed.
- Maintain 1–3 m distance to surfaces. Stay well inside the ~5 m effective range documented by 3Dmag. Too far and depth data degrades; too close and you lose the surrounding context that tracking uses to stay oriented.
- Move slowly, keep surfaces in frame. High scanning speed degrades mobile LiDAR accuracy — YellowScan's mobile LiDAR benchmarks put typical accuracy in the 1–10 cm band and note it worsens when speeds are high or trajectories poorly planned. Move deliberately and keep the camera pointed at geometry, never at empty space, which starves the tracker of reference.
- Overlap every pass. Each sweep must share reference geometry — doorways, corners, stairwells — with the one before it, per Matterport. Overlap is how the software knows two passes belong to the same building.
- Cover corners, ceilings, and floor transitions. These are the most under-scanned zones and the single most common source of holes in a finished model. Deliberately sweep where wall meets ceiling and where wall meets floor.
- Close the loop. Return to your start anchor and let the scan's end bind to its beginning. This is what suppresses cumulative drift — the difference between the 5 cm failure and the 2 cm success described earlier.
- Monitor real-time coverage feedback. Watch the mesh build on-screen as you move. Revisit any visible gaps before you stop, not after, when re-anchoring is harder.
- Re-localize after interruptions. If tracking drops, return to previously scanned geometry and let ARKit re-anchor rather than starting blind from a new position. Blind restarts are how you get doubled geometry.
Move slower than feels natural. The sensor rewards patience with geometry you can actually build from.
The payoff for all this discipline is documented, not aspirational: careful overlapping passes over a 10 × 15 × 10 m area achieved a 2 cm mean deviation with 92% of distances under 5 cm (Scientific Reports). That's the ceiling of what technique buys you on this hardware.


Exporting Your Model: OBJ, USDZ, PLY, and What Each Is Good For
The export format determines whether your building 3d model actually works in your next tool. Match the format to the destination.
| Format | Structure | Textured? | Best Downstream Use | Target User |
|---|---|---|---|---|
| OBJ | Mesh (surfaces) | Yes | CAD reference, 3D print | Architect, maker |
| USDZ | Mesh (surfaces) | Yes | AR / web preview | E-commerce, designer |
| PLY | Point cloud | Colored points | CAD import, measurement | Engineer, surveyor |
| HEVC + poses | Video + camera poses | Video frames | NeRF / SLAM pipelines | CV researcher |
If you're an architect or interior designer, you have two paths. Export a textured OBJ into your CAD environment when you want a visual reference you can trace against, or export a colored PLY point cloud when you need a measurement-grade underlay for as-built work. The point cloud preserves raw measured positions; the mesh is easier to read but carries the smoothed geometry that ARKit triangulation introduces, per Scientific Reports. Choose PLY when the numbers matter more than the picture.
If you're an e-commerce or marketplace seller, export USDZ. It drops straight into Apple Quick Look for AR previews of a product or space with no app install required on the viewer's end — a client taps a link and sees your model in their room.
If you're a CV or robotics researcher, export Pose+Video. The HEVC frames plus frame-accurate camera poses feed directly into NeRF and SLAM reconstruction pipelines, where the known poses do the geometric heavy lifting instead of forcing your solver to estimate them.
If you're a maker or 3D printing enthusiast, export the OBJ mesh, then decimate it to a manageable polygon count and repair holes before you send it to a slicer. A raw scan is rarely watertight; a printable reference needs cleanup first, and the raw point cloud route into a mesh is worth understanding if you want maximum fidelity.
The structural difference to keep straight: mesh formats (OBJ, USDZ) carry baked texture but smoothed geometry, while PLY point clouds preserve raw measured positions but need conversion before you can build surfaces from them. Every export here processes entirely on-device — no cloud upload — which means faster turnaround and full data privacy on a client's floor plan or a proprietary product, without the subscription clock that cloud-dependent competitors run against you.
Cleaning Up and Using Your Building Model in CAD, AR, and Beyond
The scan is raw material. What you do after export determines whether it becomes a deliverable.
Trimming stray geometry. Delete floating artifacts and out-of-boundary noise — people who walked through the frame, ghosted reflections off glass, phantom points beyond the walls. Most CAD and mesh tools let you box-select and delete. This is the first pass on any raw scan, and skipping it means every downstream step inherits the garbage.
Scaling and alignment. Verify real-world dimensions against a known reference and set a ground plane so the model sits level. Because building-scale scans carry 10–20 cm potential error (3Dmag), always spot-check one dimension you measured physically. If a known 3 m wall reads 3.15 m in the model, you've caught the scale before it corrupts your drawing.
Into CAD and BIM. Import the mesh or point cloud as a reference underlay and trace walls, openings, and features on top of it. Practitioners in the Chief Architect user group consistently supplement scans with a handful of physical tape measurements to correct drift — treat the scan as a fast, dense starting geometry, not as ground truth.
Into AR and web. Drop a USDZ into Apple Quick Look for client previews on-site or embedded in a listing. The viewer needs no app, which makes it the lowest-friction way to put a space in a client's hands.
Into CV and photogrammetry pipelines. Feed Pose+Video into NeRF or SLAM reconstruction, where the frame-accurate camera poses carry the reconstruction. This is the path when you want to control the geometry solve yourself rather than accept the on-device mesh.
For 3D printing. Decimate the mesh to cut polygon count to something your slicer can handle, repair non-manifold edges and holes, then export a watertight OBJ or STL. A scan is almost never printable straight out of the box — the repair pass is mandatory.
The scan is raw material, not the finished product — the value is realized in the tool you take it into.
Common Building-Scan Problems and How to Fix Them
Most failed building scans fail for the same handful of reasons. Diagnose fast, re-scan faster.
Tracking loss and drift. Caused by fast movement, framing empty space, and reliance on the phone's inertial sensors over long runs — the same mechanism behind the ±2" (~5 cm) errors and drift reported on longer scans in the Reddit r/Revit discussion. Fix it by slowing down, keeping geometry in frame at all times, re-localizing on known surfaces after any interruption, and closing your loops.
Holes in the mesh. Under-scanned corners, ceiling and floor transitions, and dark surfaces leave gaps in the model. Fix it by deliberately revisiting corners and transitions during the scan, and by adding light to dark surfaces — the RGB texture pass needs illumination even when the depth sensor doesn't.
Glass and mirror ghosting. Reflective surfaces confuse the depth return and generate phantom geometry that looks like a second room behind the glass. Fix it by covering mirrors, closing blinds, or scanning around the glass and trimming the artifacts in cleanup.
Warped or doubled geometry. This is the signature of loop-closure failure — the scan's end never bound back to its start, so the software laid a second copy slightly offset from the first. Fix it by always returning to your anchor point, and re-scan the segment if the doubling is severe. There's no reliable way to un-double a scan after the fact.
Thermal throttling on long scans. Extended continuous capture heats the phone, and a throttled processor degrades tracking mid-session. Fix it by segmenting large buildings into zones, letting the phone cool between segments, and stitching in your downstream tool rather than forcing one heroic session that overheats before it finishes.
Because processing runs entirely on-device and the app is free, you can re-scan and iterate on the spot without burning cloud credits or subscription time — a practical edge over cloud-dependent, subscription-heavy tools when your first pass comes back warped and you need a clean second attempt before you leave the site.
Building 3D Model FAQ: Accuracy, Coverage, and Requirements
How accurate is an iPhone LiDAR building 3D model compared to a laser scanner?
Expect 10–20 cm error at building scale at 95% confidence (3Dmag), versus the ±1–3 mm that survey-grade terrestrial laser scanners reach under optimal conditions, per vendor benchmarks from SCANM2. Handheld LiDAR has matched TLS to within a 3 cm RMSE in a controlled forensic comparison, according to a study in PMC. It's excellent for documentation, not for tight-tolerance design.
Can I scan an entire multi-room building or floor in one session?
Yes, with discipline. Move room-to-room and make sure doorways and hallways connect each zone cleanly, per Matterport. Watch for thermal throttling on very long runs, and segment large footprints into overlapping chunks you stitch afterward rather than risking one drifting marathon pass.
Which iPhones support building-scale LiDAR scanning?
The iPhone 12 Pro and later Pro-series models carry the LiDAR sensor required for this workflow — standard non-Pro models don't. If you're new to the category, a beginner's overview of what an iPhone LiDAR scanner actually is will clarify the hardware requirement. Android support is planned.
Does Voxelio require a subscription or cloud account to export?
No. It's free to download with no subscription, and all capture and export processing happens on-device — nothing uploads to a server to get processed. That keeps client floor plans and proprietary product geometry on your own device.
Can I get accurate measurements and floor plans from the exported model?
Yes, by taking the point cloud export into CAD. But always verify against a few physical tape measurements — practitioners in both the Chief Architect user group and the Reddit r/Revit thread consistently supplement scans to correct for drift before trusting the numbers in a drawing.