How Engineers Use 3D Scanning to Accelerate Design and Reverse Engineering
How Engineers Use 3D Scanning to Accelerate Design and Reverse Engineering
You're staring at a 30-year-old centrifugal pump with a failed bushing. The production line is down, the original manufacturer is out of business, and the only documentation is a hand-drawn shop sketch with coffee stains obscuring the bore tolerance. Your machinist needs a STEP file by tomorrow morning. This is where 3D scanning engineering workflows stop being theoretical and start being the difference between a four-hour fix and a four-week shutdown.
The mechanical reality of reverse engineering hasn't changed in fifty years: physical geometry must become editable CAD geometry before anyone can fabricate a replacement. What has changed is the friction between those two states. Smartphone LiDAR, handheld scanners, and on-device mesh reconstruction have collapsed a workflow that used to require service bureaus and shipped parts into something you can complete with a phone before lunch—provided you understand which tolerance bands the technology actually serves.

Table of Contents
- The Engineering Problems That 3D Scanning Actually Solves
- Scanning vs. Traditional Measurement: A Decision Matrix for Engineers
- Matching Capture Mode to Engineering Output
- The Scan-to-CAD Workflow: From iPhone Capture to STEP Export
- Engineering Disciplines Using 3D Scanning Today
- How to Evaluate a 3D Scanning App for Engineering Work
- Pre-Scan Engineering Checklist
The Engineering Problems That 3D Scanning Actually Solves
Return to that pump bushing scenario. You have three traditional paths to a replacement part, and each one introduces a specific kind of friction into the engineering workflow.
Manual measurement with calipers and depth gauges is the default for most shop-floor reverse engineering. You'll spend two to four hours per part building up a dimensional sketch, and you'll absorb ±2–5 mm of human error that stacks across features. Most engineers running this workflow report three to four trial-fit prototype iterations before the replacement seats correctly—not because the calipers lie, but because feature-by-feature measurement loses the relational geometry between surfaces. The fillet radius you measured in isolation matters only relative to the boss it transitions into.
CMM (coordinate measuring machine) inspection is the gold standard for tolerance-critical work. According to the UC Davis Tech Foundry, 3D measurement systems in this class achieve ±50–100 micron accuracy depending on configuration—well into sub-millimeter territory. The trade-offs are structural: CMM requires lab access, a trained operator, fixturing time, and roughly $200–1,000 per use at a service bureau. The machine cannot come to the pump; the pump must come to the machine.
Outsourced professional laser scanning delivers ±1–2 mm accuracy and full geometric capture, but the project clock starts when you ship the part and stops two to four weeks later when the deliverable arrives. Per-project costs typically run between $500 and $5,000 depending on complexity. For confidential geometry, you've also handed proprietary IP to a third party.
Then there's the fourth option: handheld or smartphone LiDAR scanning. Capture takes 15–30 minutes per discrete assembly according to Formlabs benchmarks, the geometry exports on-device, and you can have an OBJ or PLY in your CAD package the same afternoon. The accuracy band is genuinely centimeter-level (±1–3 cm)—not the "millimeter precision" some vendor marketing implies. Be skeptical of any consumer-grade scanning app that promises sub-millimeter accuracy without naming its measurement methodology.
The question is not whether smartphone LiDAR replaces CMM. It does not. The question is which tasks live in the tolerance band where scanning is sufficient—and the answer covers most everyday engineering work. Assembly fit verification, clearance checks, bracket retrofits, MEP routing, design-intent capture, brownfield documentation: all of these operate in the ±1 mm to ±3 cm window where scan-derived geometry is fully usable as CAD reference. The remaining tolerance-critical 20% (bearing fits, sealing surfaces, tolerance stacks) still requires contact metrology. That has not changed.
Four engineering pain points map cleanly to scanning solutions:
- Documentation gaps. Legacy parts with no CAD, undocumented as-built site conditions, equipment modified during installation. Scanning captures the geometry as it actually exists, not as it was originally specified.
- Site revisit cost. Capture the install zone once, design remotely. A 20-minute scan replaces three site visits with measuring tape.
- Iteration speed. Skipping two to three trial-fit prototypes compresses a multi-week loop into a single fabrication cycle.
- Service bureau bottleneck. A 15-minute capture replaces a two-week turnaround for geometry that was never tolerance-critical in the first place.
Smartphone LiDAR will not replace your CMM. It replaces the two-week wait for a service bureau to send back a point cloud you could have captured yourself before lunch.
The honest framing: smartphone LiDAR is a friction-removal tool, not a metrology revolution. The accuracy gap between centimeter-level field capture and micron-level lab inspection is real, persistent, and structural. The value is in the tasks that never needed micron precision—the ones that were being done with calipers and patience because there was no better option for capturing relational geometry quickly.
Scanning vs. Traditional Measurement: A Decision Matrix for Engineers
Method selection is a function of three variables: tolerance band, timeline, and budget. Match all three and you've chosen correctly. Mismatch any one and you've either wasted time on the wrong tool or produced data your fabricator can't use.
| Method | Capture Time | Cost Per Use | Accuracy | Best For |
|---|---|---|---|---|
| Manual measurement (calipers) | 2–4 hours/part | ~$0 | ±2–5 mm | Single-feature, simple geometry |
| CMM inspection | 4–8 hours + setup | $200–1,000+/use | ±0.1 mm | Tolerance-critical features |
| Service bureau laser scan | 2–4 weeks | $500–$5,000 | ±1–2 mm | Complex geometry, compliance |
| Desktop structured-light | 30–60 min | $1,500–$10,000 equipment | ±0.5–1 mm | QC, surface inspection |
| Handheld professional scanner | 15–45 min | $5,000–$50,000 equipment | ±0.1–0.5 mm | Field metrology |
| Smartphone LiDAR app | 15–30 min | Free | ±1–3 cm | Design reference, retrofits |
Accuracy figures sourced from UC Davis Tech Foundry (independent), Formlabs (vendor-reported), and 3D-ScanTech (vendor-reported).

Tolerance band drives method selection. If your part has a press-fit, bearing surface, or sealing groove with tolerance tighter than ±0.5 mm, smartphone LiDAR is the wrong tool. Use CMM or structured-light. If your tolerances are ±1 mm or looser—which covers most brackets, housings, enclosures, ductwork, and retrofit work—smartphone LiDAR delivers sufficient geometric fidelity. You can also improve scan accuracy with reference markers for scale validation when working at the edge of the tolerance band.
Timeline drives the friction calculation. Manual measurement is "free" but consumes engineering hours that cost the company $80–150 each. Service bureaus are accurate but block the project for weeks. Smartphone scanning collapses capture time to minutes—the trade-off being that you absorb the centimeter-level accuracy ceiling.
Where smartphone LiDAR genuinely wins: field documentation, as-built surveys, design-intent capture, occlusion-heavy environments a CMM cannot reach, and any context where the deliverable is "reference geometry for CAD sketching" rather than "inspection-grade dimensional report."
Where smartphone LiDAR loses: first-article inspection, GD&T validation, tolerance-stack-critical features, and regulated industries requiring traceable metrology (aerospace flight-critical, medical implants). Do not present scan-derived dimensions as tolerance-grade in fabrication drawings. The accuracy isn't there, and downstream liability isn't worth pretending otherwise.
Matching Capture Mode to Engineering Output: Mesh, Point Cloud, Pose+Video, MultiCam
Capture mode is a function of your downstream pipeline, not your object. The same pump housing produces four different deliverables depending on what you intend to do with the geometry next. Choose the mode that matches your CAD workflow, not the one that looks prettiest on the phone screen.
Mesh Capture — when you need assembly context and visual fidelity
Best for documenting how a part sits in its environment: clearances, routing, mounting interfaces. Exports textured OBJ or USDZ files with baked surface textures applied directly on-device—no cloud atlas processing required. Use mesh capture when your deliverable is a reference model for CAD design, AR stakeholder review, or installation documentation. Mesh quality depends heavily on lighting; bright, diffuse, even illumination produces the cleanest topology. Backlit or specular surfaces will produce noise and holes.
Point Cloud Capture — when you need raw geometry for feature extraction
Best for reverse engineering tasks where you'll sketch new CAD geometry on top of scanned reference. Exports colored PLY files compatible with CloudCompare, MeshLab, SolidWorks ScanTo3D, and Fusion 360 point cloud modules. Engineers use point clouds for surfacing (lofted or swept features built from cross-sections), structural analysis preprocessing, and dimensional comparison via cloud-to-CAD deviation overlay. Point clouds preserve the raw measurement data without the smoothing introduced by mesh reconstruction—useful when you need to make your own decisions about feature edges.
Pose+Video Capture — when camera trajectory is the deliverable
Best for CV and robotics workflows: SLAM benchmarking, NeRF training data, photogrammetry pipelines that require frame-accurate ground truth. Exports HEVC video alongside per-frame camera pose (XYZ position plus rotation quaternions). This is the mode most relevant to research applications where scene reconstruction happens downstream in a custom pipeline. The pose log is what separates this from a generic video recording—it's reproducible spatial data, not visual reference.
MultiCam Capture — when one device cannot see everything
Best for large assemblies, production floors, and occlusion-heavy objects like engine bays or machinery with internal cavities. Fuses scans from multiple iPhone devices on-device—no cloud stitching, no upload latency, no per-scan service fee. Use MultiCam when a single sweep leaves coverage gaps or when documenting an installation that requires simultaneous capture from multiple stations. Two operators with two phones cover roughly four times the surface area of a single operator orbiting alone.

The right capture mode depends on your next step, not what you can scan. Feeding geometry into CAD for feature sketching? A point cloud beats a mesh. Need assembly context? A textured mesh tells the story faster than dimensions alone.
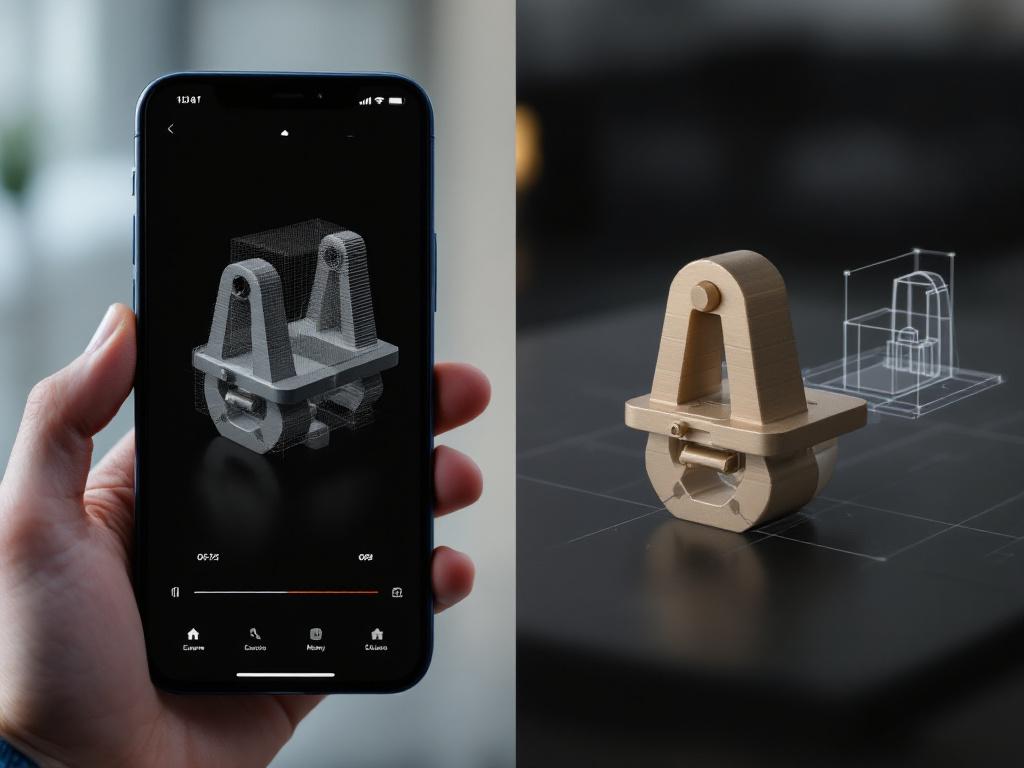
The Scan-to-CAD Workflow: From iPhone Capture to STEP Export
Six concrete steps separate a physical object from a fabrication-ready STEP file. Each one has specific decision points, numerical guidance, and validation criteria. Skip a step and you'll discover the gap at fabrication, not at design review.
Step 1 — Capture the object (15–30 minutes)
Position the iPhone Pro 0.5–3 meters from the target. Closer distances for small handheld parts, farther for assemblies or rooms. Use Mesh mode for assembly documentation and stakeholder presentation; use Point Cloud mode for feature extraction in CAD. Lighting matters more than any other variable: bright, diffuse, no backlighting. Direct sun behind the object will starve the LiDAR sensor and produce a swiss-cheese mesh. Move the device in a slow, deliberate orbit with overlapping passes—if tracking drops, stop and recover before continuing. The complete capture process walks through device motion patterns in more detail. Export to the Files app as OBJ for mesh or PLY for point cloud. Formlabs benchmarks capture time at 15–30 minutes for a discrete mechanical assembly.
Step 2 — Assess geometry quality before CAD import
Open the export in iPhone's Quick Look or a desktop viewer (MeshLab, Preview, Blender). Inspect three things: occlusion gaps (missing back-side or undercut geometry), noise patches (typically at edges, deep recesses, or low-reflectivity surfaces), and scale anomalies. If a critical feature is missing or noisy, re-scan that region now rather than fight it in CAD later. Per Formlabs guidance, deep recesses commonly require multiple capture passes from different angles—plan for this rather than discovering it after you've left the site.
Step 3 — Import into CAD as reference geometry
Each CAD package has its own import path:
- Fusion 360: Insert > Mesh, then convert to BRep or retain as design underlay
- SolidWorks: ScanTo3D add-in for mesh preparation, or Insert > Feature > Imported for STL/OBJ
- FreeCAD: Mesh workbench → import OBJ → convert to Part shape
- Rhino: Drag-drop OBJ; use Mesh tools to clean before NURBS surfacing
- Point clouds (PLY): Load into CloudCompare for cleanup, export cross-sections as DXF for CAD sketching
The critical mindset: scanned mesh is reference geometry, not editable CAD geometry. You will not parametrically modify scan triangles. You will sketch on top of them.
Step 4 — Validate scale against a known reference
Smartphone LiDAR is generally well-scaled, but always validate before committing to fabrication geometry. Measure one known dimension on the scan—a bolt hole diameter, an edge length, the width of a placed reference object—and compare to a physical caliper measurement. If scaling drift exceeds 1%, apply a uniform scale factor in CAD before sketching. For tight-tolerance work, scan markers for dimensional validation provide a fixed reference length that survives the capture-to-CAD transition.
Step 5 — Extract features and sketch clean geometry
Use the scan as an underlay, not a starting BRep. Project edges onto sketch planes, snap to hole centers, trace bosses and pockets. Build new parametric features on top of the scan reference. Do not attempt to convert raw mesh triangles into editable CAD features—this fails for anything beyond simple primitives, and the resulting geometry is unsketchable downstream. For complex surfaces, slice the point cloud into cross-sections, sketch profiles in each plane, and loft or sweep between them. This produces clean parametric surfaces from messy scan data.
Step 6 — Validate and export for fabrication
Compare final CAD against the scan via deviation analysis (Fusion 360 Inspect, SolidWorks Compare, or CloudCompare's cloud-to-mesh distance tool). Flag any region exceeding your project's tolerance band. Export STEP for CNC, STL for 3D printing, DWG for fabrication documentation. Annotate critical dimensions with their measurement source—mark scan-derived dimensions explicitly as centimeter-grade and verify any tolerance-critical features with contact metrology before signing off the drawing. Never present scan-derived dimensions as inspection-grade in a fabrication package.
Engineering Disciplines Using 3D Scanning Today — Five Concrete Use Cases
The technology is the same across disciplines. What changes is the tolerance band, the deliverable, and the failure mode if you get it wrong. Five scenarios where scanning is doing real engineering work right now.
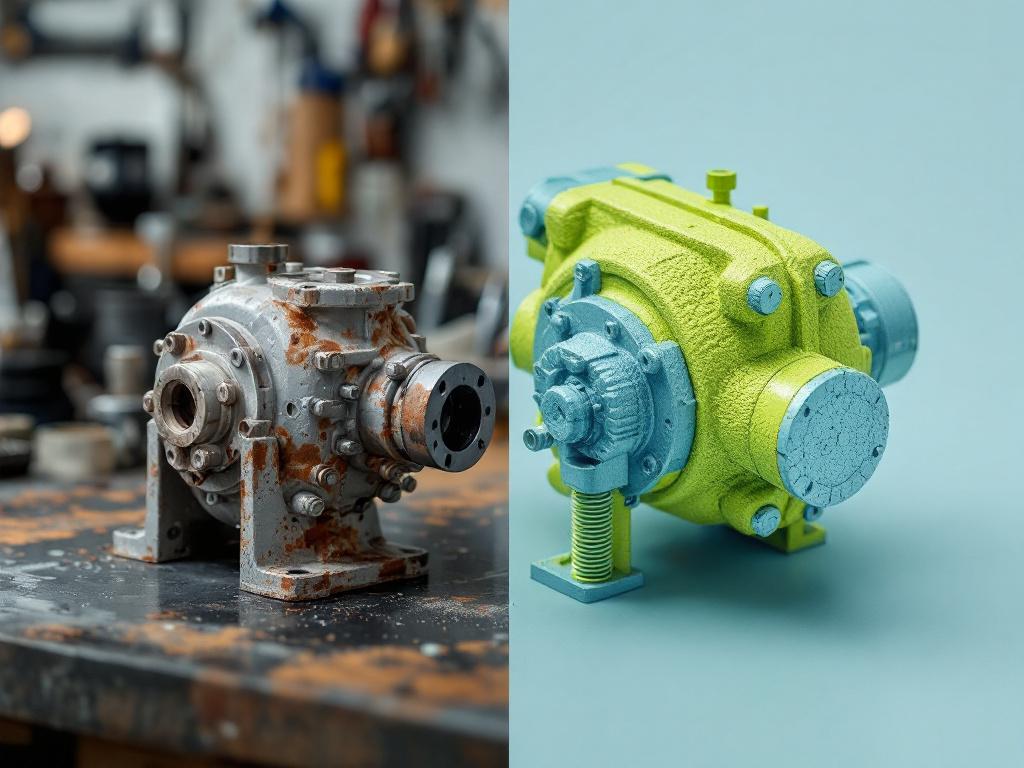
Reverse engineering legacy parts (mechanical, manufacturing)
The pump bushing scenario, played out across thousands of maintenance shops. Original CAD is missing, hand sketches are lost, and the OEM either doesn't exist or no longer supports the part. Traditional approach: caliper measurement plus three to four trial-fit iterations until the replacement seats. Scanning approach: capture the bushing with Point Cloud mode, import the PLY into Fusion 360, sketch the profile from a cross-section, validate the bore diameter with one physical caliper check, export STEP for CNC. Vendor case studies from Polyga (treat as marketing) suggest fewer iteration cycles because clearance geometry is captured holistically rather than feature-by-feature. The practical outcome most engineers report: one trial fit instead of three, because the relational geometry between features is preserved in the scan. For teams documenting this kind of workflow systematically, accelerating product development with 3D scanning covers iteration-cycle compression in more depth.
Aerospace and defense maintenance documentation
Documenting engine mount geometry for stress analysis on a legacy airframe modification. Traditional approach: CMM in a lab, which requires removing the part and shipping it. Scanning approach: capture in-situ on the aircraft using MultiCam for full coverage of the mounting interfaces. Centimeter precision is sufficient for interface geometry verification—how the mount sits in the bay, what clearances surround it, what routing constraints affect a replacement design. It is not sufficient for bolt-hole tolerances or fastener torque-bearing surfaces, both of which still require contact metrology. Integration path: scan → mesh → CAD → FEA pre-processor. The critical disclaimer: regulated aerospace work requires traceable metrology with documented uncertainty. Smartphone scanning is a design-aid layer in this context, not a flight-critical inspection tool. Anyone presenting scan-derived dimensions as airworthiness data has misunderstood the technology.
Manufacturing first-article inspection support
First-article verification of a CNC-machined housing before production release. Traditional approach: full CMM inspection program with formal reporting. Scanning approach: smartphone LiDAR provides rapid go/no-go geometric overlay—a cloud-to-CAD deviation map that flags obvious dimensional drift. Anything within ±1 cm reads as "looks right, send to CMM for tolerance verification." Anything outside that band reads as "stop and rework"—no CMM appointment needed for the obvious failures. This is a triage role, not a certification role. The value is in catching gross errors before they consume CMM bench time, not in replacing the CMM. A QA engineer who runs this workflow filters maybe 80% of obvious issues at the scanning step and reserves the certified metrology for genuinely close calls.
Industrial retrofit and brownfield engineering
Adding a new sensor mount, conduit run, or ducting routing to existing equipment with no original drawings. Traditional approach: site survey with measuring tape, photos, hand sketches, and typically two to three site revisits to verify clearances and resolve drawing ambiguities. Scanning approach: capture the install zone in 20 minutes with Mesh mode, import the textured OBJ into CAD, design the new bracket against the scanned surroundings. Clearances and routing conflicts surface in CAD review, not at install time when the contractor has already drilled the wrong hole. The UC Davis Tech Foundry explicitly identifies "designing surrounding parts or assemblies" as a primary 3D scanning use case—it is one of the cleanest fits between technology capability and engineering need.
Architectural and MEP coordination
Documenting interior dimensions of a mechanical room for ductwork routing or equipment installation. Traditional approach: laser distance meter plus hand sketches plus Revit modeling from measurements. Scanning approach: Point Cloud mode capture of the room, export PLY, import into Revit or AutoCAD via the point cloud workflow. Centimeter precision is fully adequate for MEP coordination—architects and trade engineers do not need micron tolerances for spatial layout work. Two limitations to plan around: highly reflective surfaces (polished metal, glass, mirrored finishes) produce noise or holes, and very dark surfaces absorb the LiDAR signal. Supplement with manual measurement at those features rather than trusting the scan blindly. The deliverable is a coordinated layout, not a stress analysis, and centimeter accuracy maps cleanly to construction tolerances.
How to Evaluate a 3D Scanning App for Engineering Work — Seven Technical Criteria
Most app comparisons devolve into feature checklists that ignore what matters for engineering pipelines. Use these seven criteria to evaluate any scanning app—Polycam, Scaniverse, 3D Scanner App, Canvas, Voxelio, or whatever launches next quarter—against the technical requirements of your actual workflow.
| Criterion | Why It Matters for Engineers | What to Look For |
|---|---|---|
| On-device processing | Data custody, offline use, no per-scan latency | Local mesh reconstruction; no mandatory cloud upload |
| Textured mesh export | CAD reference, AR review, stakeholder docs | OBJ + USDZ with baked textures |
| Point cloud export | Feature extraction, surfacing, deviation analysis | Colored PLY with documented density spec |
| Camera pose export | SLAM, NeRF, photogrammetry research | HEVC + per-frame pose log (XYZ + rotation) |
| Spatial precision spec | Match tool to tolerance band | Transparent centimeter claim, not inflated "mm" |
| Multi-device fusion | Large objects, occlusion gaps | On-device alignment without cloud stitching |
| Format ecosystem fit | Direct pipeline integration | OBJ, USDZ, PLY, plus pose for research |
On-device processing is the criterion most engineers underweight until it bites them. Cloud-dependent apps create three problems for professional workflows. First, data custody: proprietary geometry uploaded to a third-party server is a non-starter for defense contractors, medical device manufacturers, and any firm operating under NDA. Second, per-scan latency: a five-minute render queue breaks a field workflow that depends on validating capture quality before leaving the site. Third, subscription pricing that scales with usage—a model that punishes high-volume professional users. Voxelio's pipeline runs entirely on-device, which eliminates all three issues structurally rather than as a workaround.
Format breadth matters because engineering pipelines fragment across software. OBJ for visualization in Blender or Rhino, PLY for point cloud work in CloudCompare or SolidWorks, USDZ for AR review in Quick Look or Apple Vision Pro, HEVC plus pose for CV research in custom Python pipelines. Apps that lock you into a proprietary format or a single export option force conversion overhead and limit downstream flexibility.
Subscription model is a structural cost, not a feature. Professional scanning apps in this category typically charge $15–40 per month, scaling to enterprise pricing for teams. For an engineer running 20 scans a month across multiple projects, that's a per-project cost that compounds quickly. A free tool with no subscription—the model Voxelio uses—reduces the per-project marginal cost to zero, which changes how aggressively you're willing to scan as a first-pass tool rather than reserving capture for high-value cases.
The honest framing: no app dominates every criterion. Polycam has stronger photogrammetry. Scaniverse has refined consumer UX. Professional tools like Artec or Faro deliver sub-millimeter accuracy that no smartphone matches. Evaluate against your specific pipeline rather than against generic marketing.
On-device processing is not a luxury for engineering workflows—it is a requirement. Cloud-dependent apps introduce latency, data custody risk, and per-scan cost. Professional use means exports immediately after capture, not after a render queue completes.
Pre-Scan Engineering Checklist — Setup, Capture, and CAD Handoff
Print this. Walk through it before your next scan. Every item is answerable yes or no—no vague "ensure quality" language.
Before you pick up the device
- Define the tolerance band. Is this a ±1 cm task (brackets, retrofits, layout, MEP routing) or a ±0.1 mm task (bearing fits, sealing surfaces, press fits)? If the latter, stop. Use CMM or contact metrology instead.
- Identify the export destination. Fusion 360, SolidWorks, Rhino, CloudCompare, Blender, Revit? This determines whether you export OBJ (mesh), PLY (point cloud), USDZ (AR review), or convert downstream to STEP. Choose capture mode accordingly.
- Plan for occlusions. Walk around the object before capturing. List every surface that's hidden from a single viewpoint—undercuts, internal cavities, back faces. Each of these requires either re-orientation between passes or MultiCam from a second device.
- Check lighting. Bright, diffuse, no backlighting. Direct sunlight behind the target will blind the LiDAR sensor. Overhead diffuse light or shaded outdoor conditions are ideal. Bring a portable LED panel if the scene is dim.
- Place a reference scale in frame. A ruler, a coin of known diameter, or a machined feature with a verified dimension. You'll use this in Step 12 to validate scale before sketching CAD.
- Run a 30-second test capture. Confirm tracking quality, mesh density, and texture fidelity before committing to a full sweep. A failed test capture saves you a failed real capture.
During capture and immediately after
- Move slowly and deliberately. Slow orbital motion at 0.5–3 m distance from the target. Stop and recover if tracking drops rather than pushing through and hoping the data aligns later.
- Capture from multiple heights. Top-down, side-on, low-angle. Especially important for objects with undercuts, recessed features, or anything the LiDAR cannot see from a standing eye-level orbit.
- Export both mesh and point cloud when feasible. Mesh for visual reference and stakeholder review, point cloud for feature extraction in CAD. Hedge your output format—re-scanning the object is more expensive than dual-exporting.
- Open the export immediately on-device. Spot-check before leaving the site. A failed scan caught at the workbench is recoverable; one caught at your desk requires a return trip and another day on the schedule.
- Document the metadata. Date, device model, lighting conditions, operator, ambient temperature if relevant. Future-you will need this when reconciling discrepancies between scans separated by months.
Before CAD handoff
- Verify scale. Measure one known dimension on the scan against a physical caliper reading. If drift exceeds 1%, apply uniform scale correction in CAD before any sketching begins. Scale errors compound across every downstream feature.
- Inspect for critical-feature gaps. Hole locations, mounting edges, mating surfaces, interface boundaries. If any are missing or noisy, re-scan that region before sketching. Filling gaps in CAD is guesswork; re-scanning is measurement.
- Decide the sketching strategy. Will you trace the scan as an underlay with projected edges, or section the point cloud into cross-sections and loft new surfaces between them? The choice depends on geometry complexity and determines your CAD prep work.
- Confirm tolerance documentation. On the fabrication drawing, annotate which dimensions came from the scan (centimeter-grade) versus which were verified by contact metrology (sub-millimeter). Never present scan-derived dimensions as tolerance-grade. The accuracy isn't there, the liability is real, and the machinist deserves to know which numbers came from a phone and which came from calipers.